How to use Coursenomic
A short guide to running your institute — from signing up to courses, attendance, certificates, finance, and your team.
Overview
Coursenomic runs the day-to-day of a training institute — course catalog and class batches, student records, QR attendance, certificates, payments, and revenue — across one or many branches, in English and Thai.
It's built for two roles: the owner, who sets up and runs everything, and branch managers, who work only with the branches you assign them. This guide walks through each part in the order you'll usually meet it.
Getting started
Create your workspace in a few minutes.
- 1Create your accountRegister with your email and a password, then enter the 6-digit code we email you to verify it.
- 2Set up your instituteName it, choose a URL slug, and pick a 3-letter prefix used for student IDs — e.g. ABC produces ABC-00001.
- 3Choose a planStart on Free, or pick a paid plan billed monthly, quarterly, or yearly. You can change this anytime under Subscription.
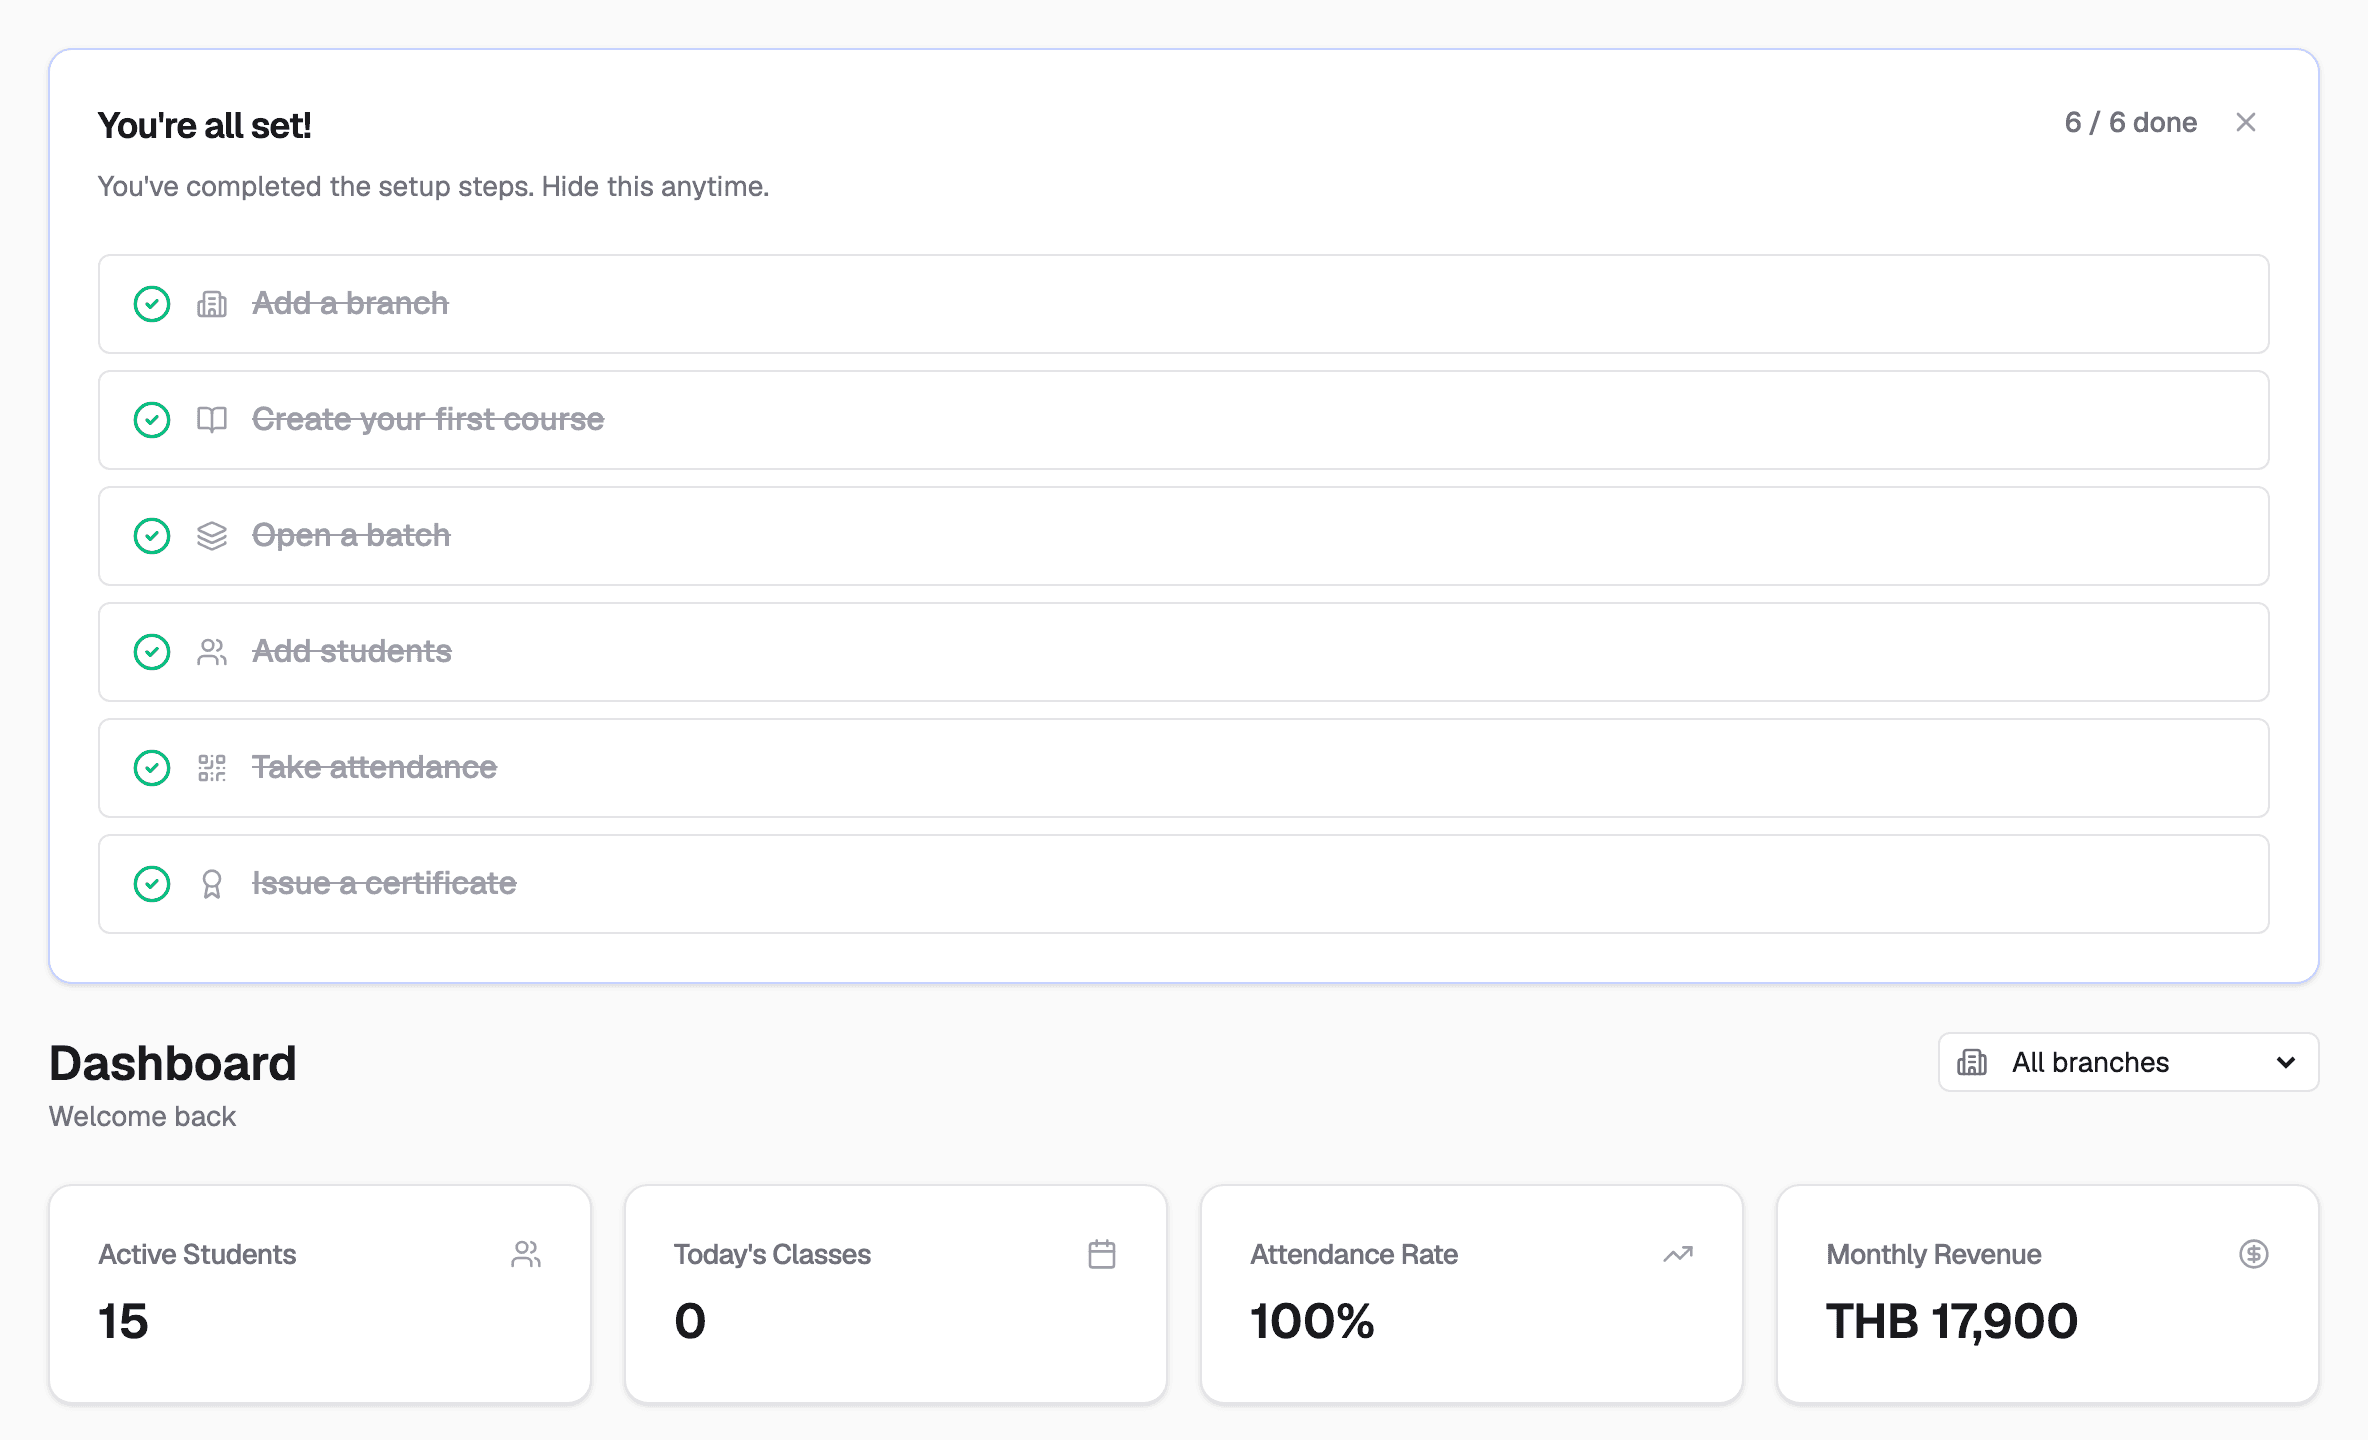
- 4You're inLand on the dashboard with a getting-started checklist that tracks your first branch, course, batch, student, attendance, and certificate.
You can explore every feature on the Free plan. A few (CSV import/export and LINE) unlock on paid plans — see Plans & subscription below.
Courses
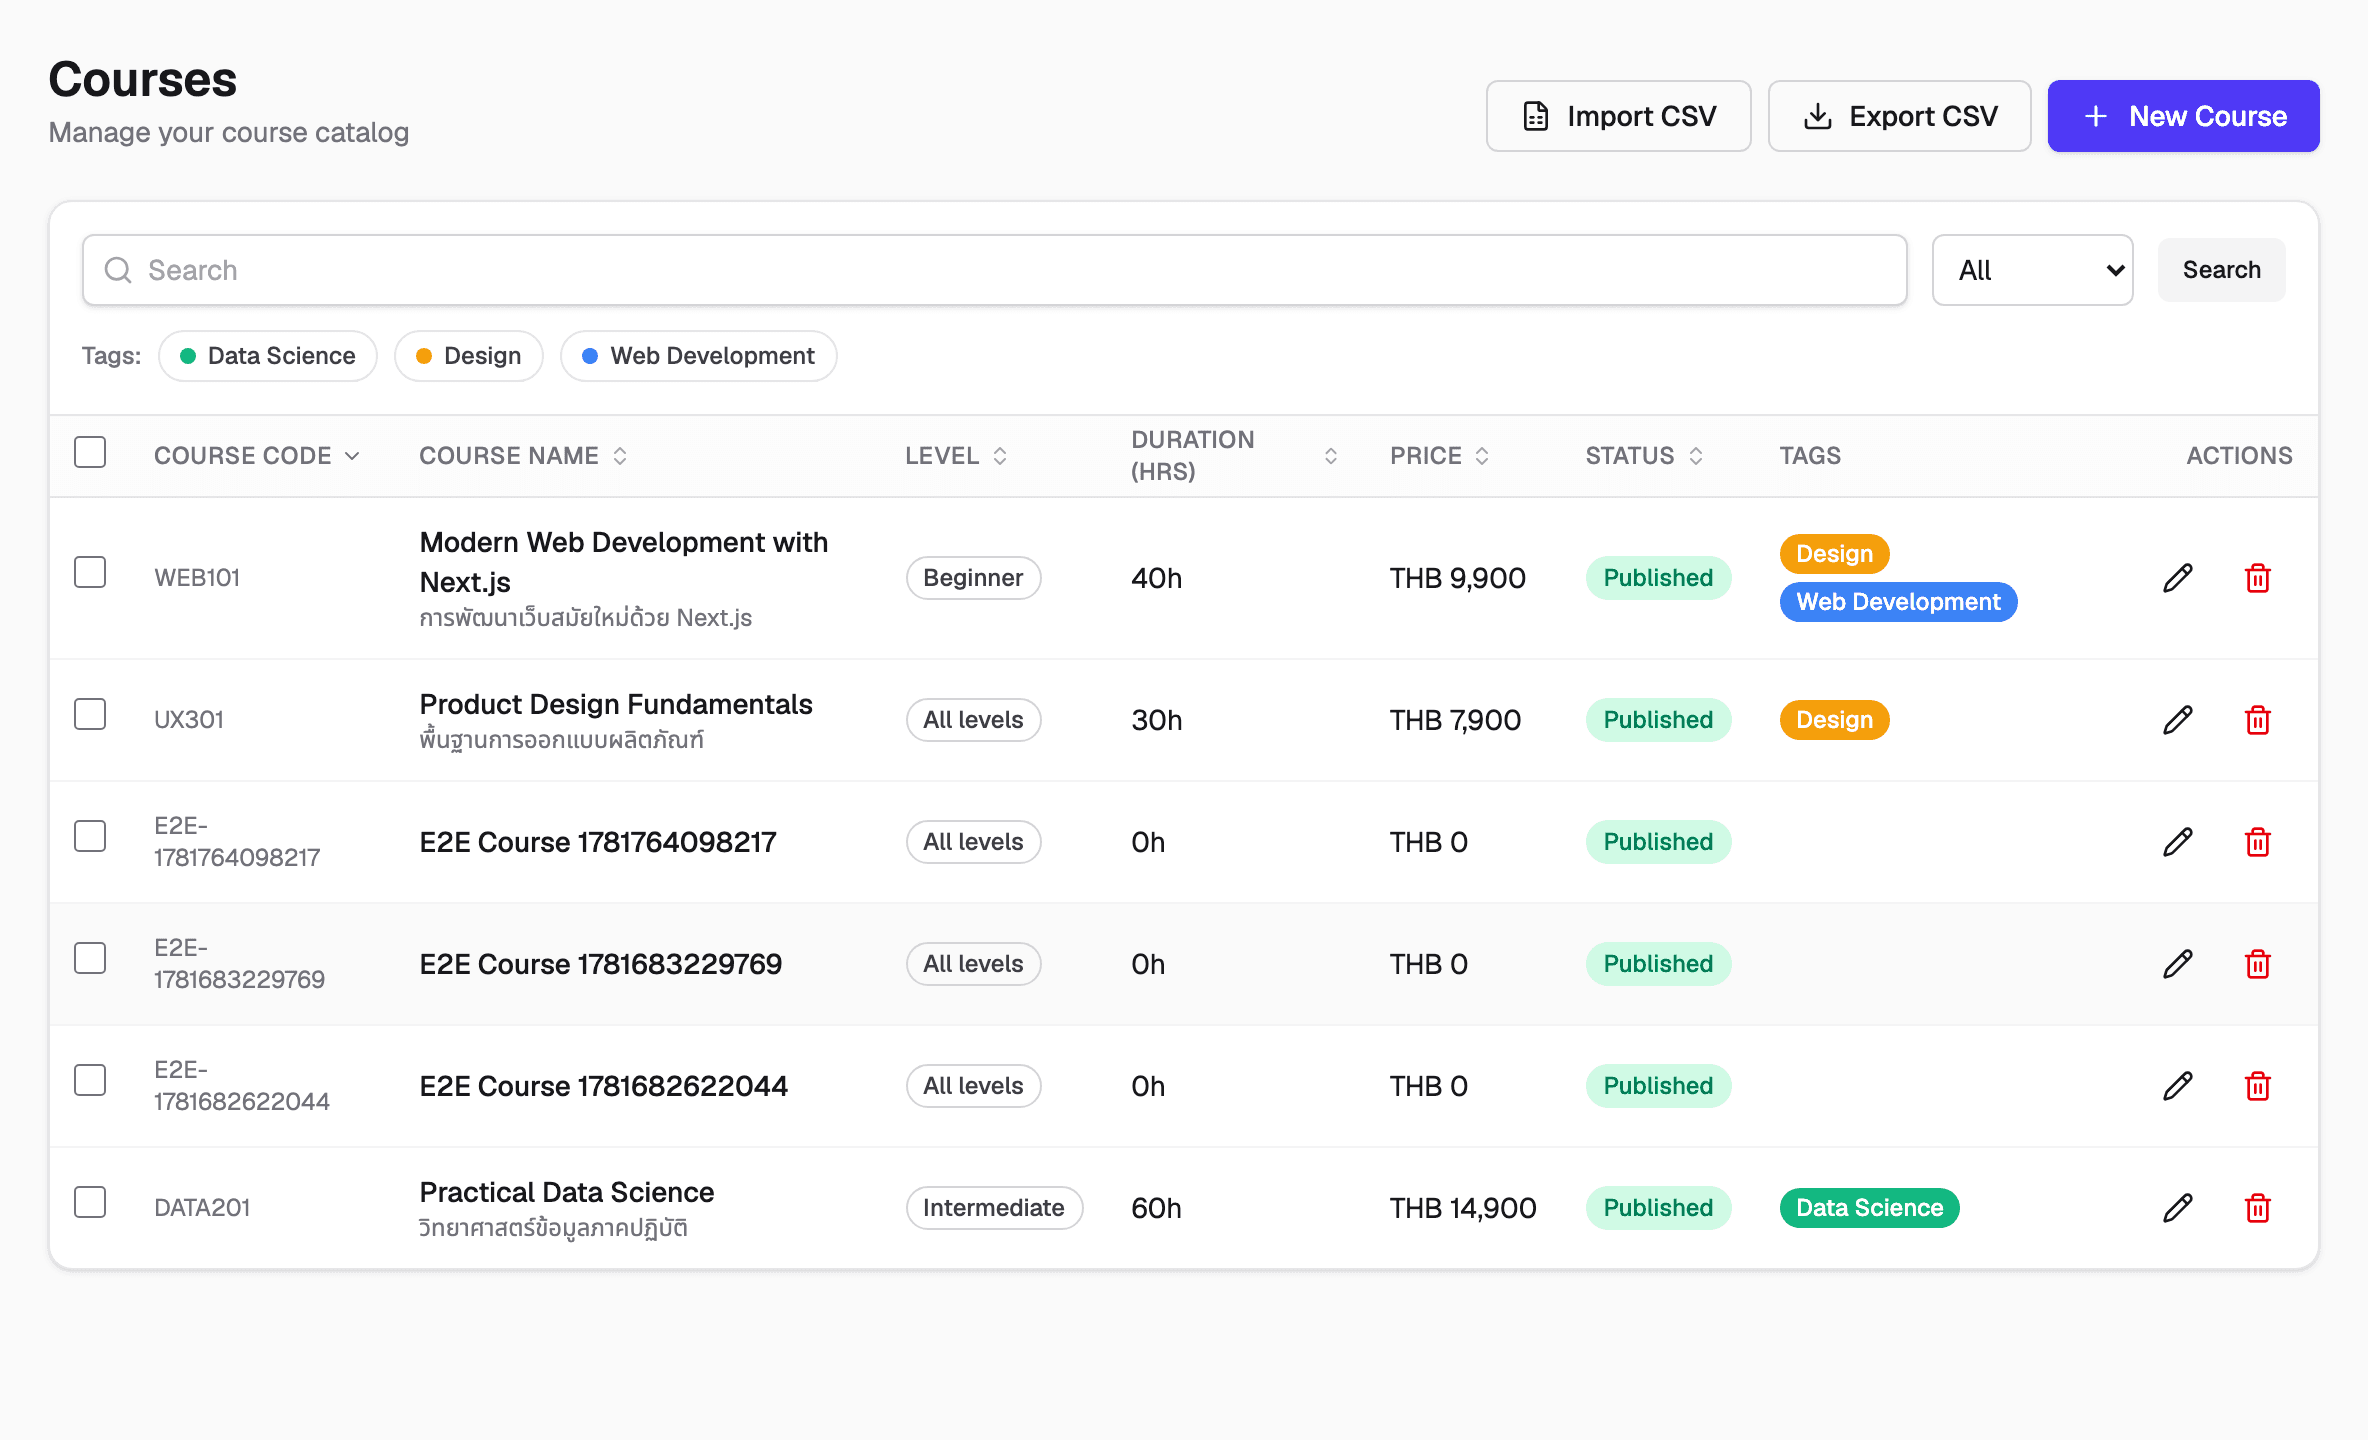
A course is a catalog entry. Open Courses and create one with a bilingual name, level (Beginner / Intermediate / Advanced), duration, price in baht, capacity, and the attendance threshold — the percentage of sessions a student must attend to earn a certificate. Add tags to group and filter courses.
Courses start as Draft; publish one to make it enrollable. Have a spreadsheet already? Use CSV import to add courses in bulk.
CSV import and export are available on paid plans.
Batches
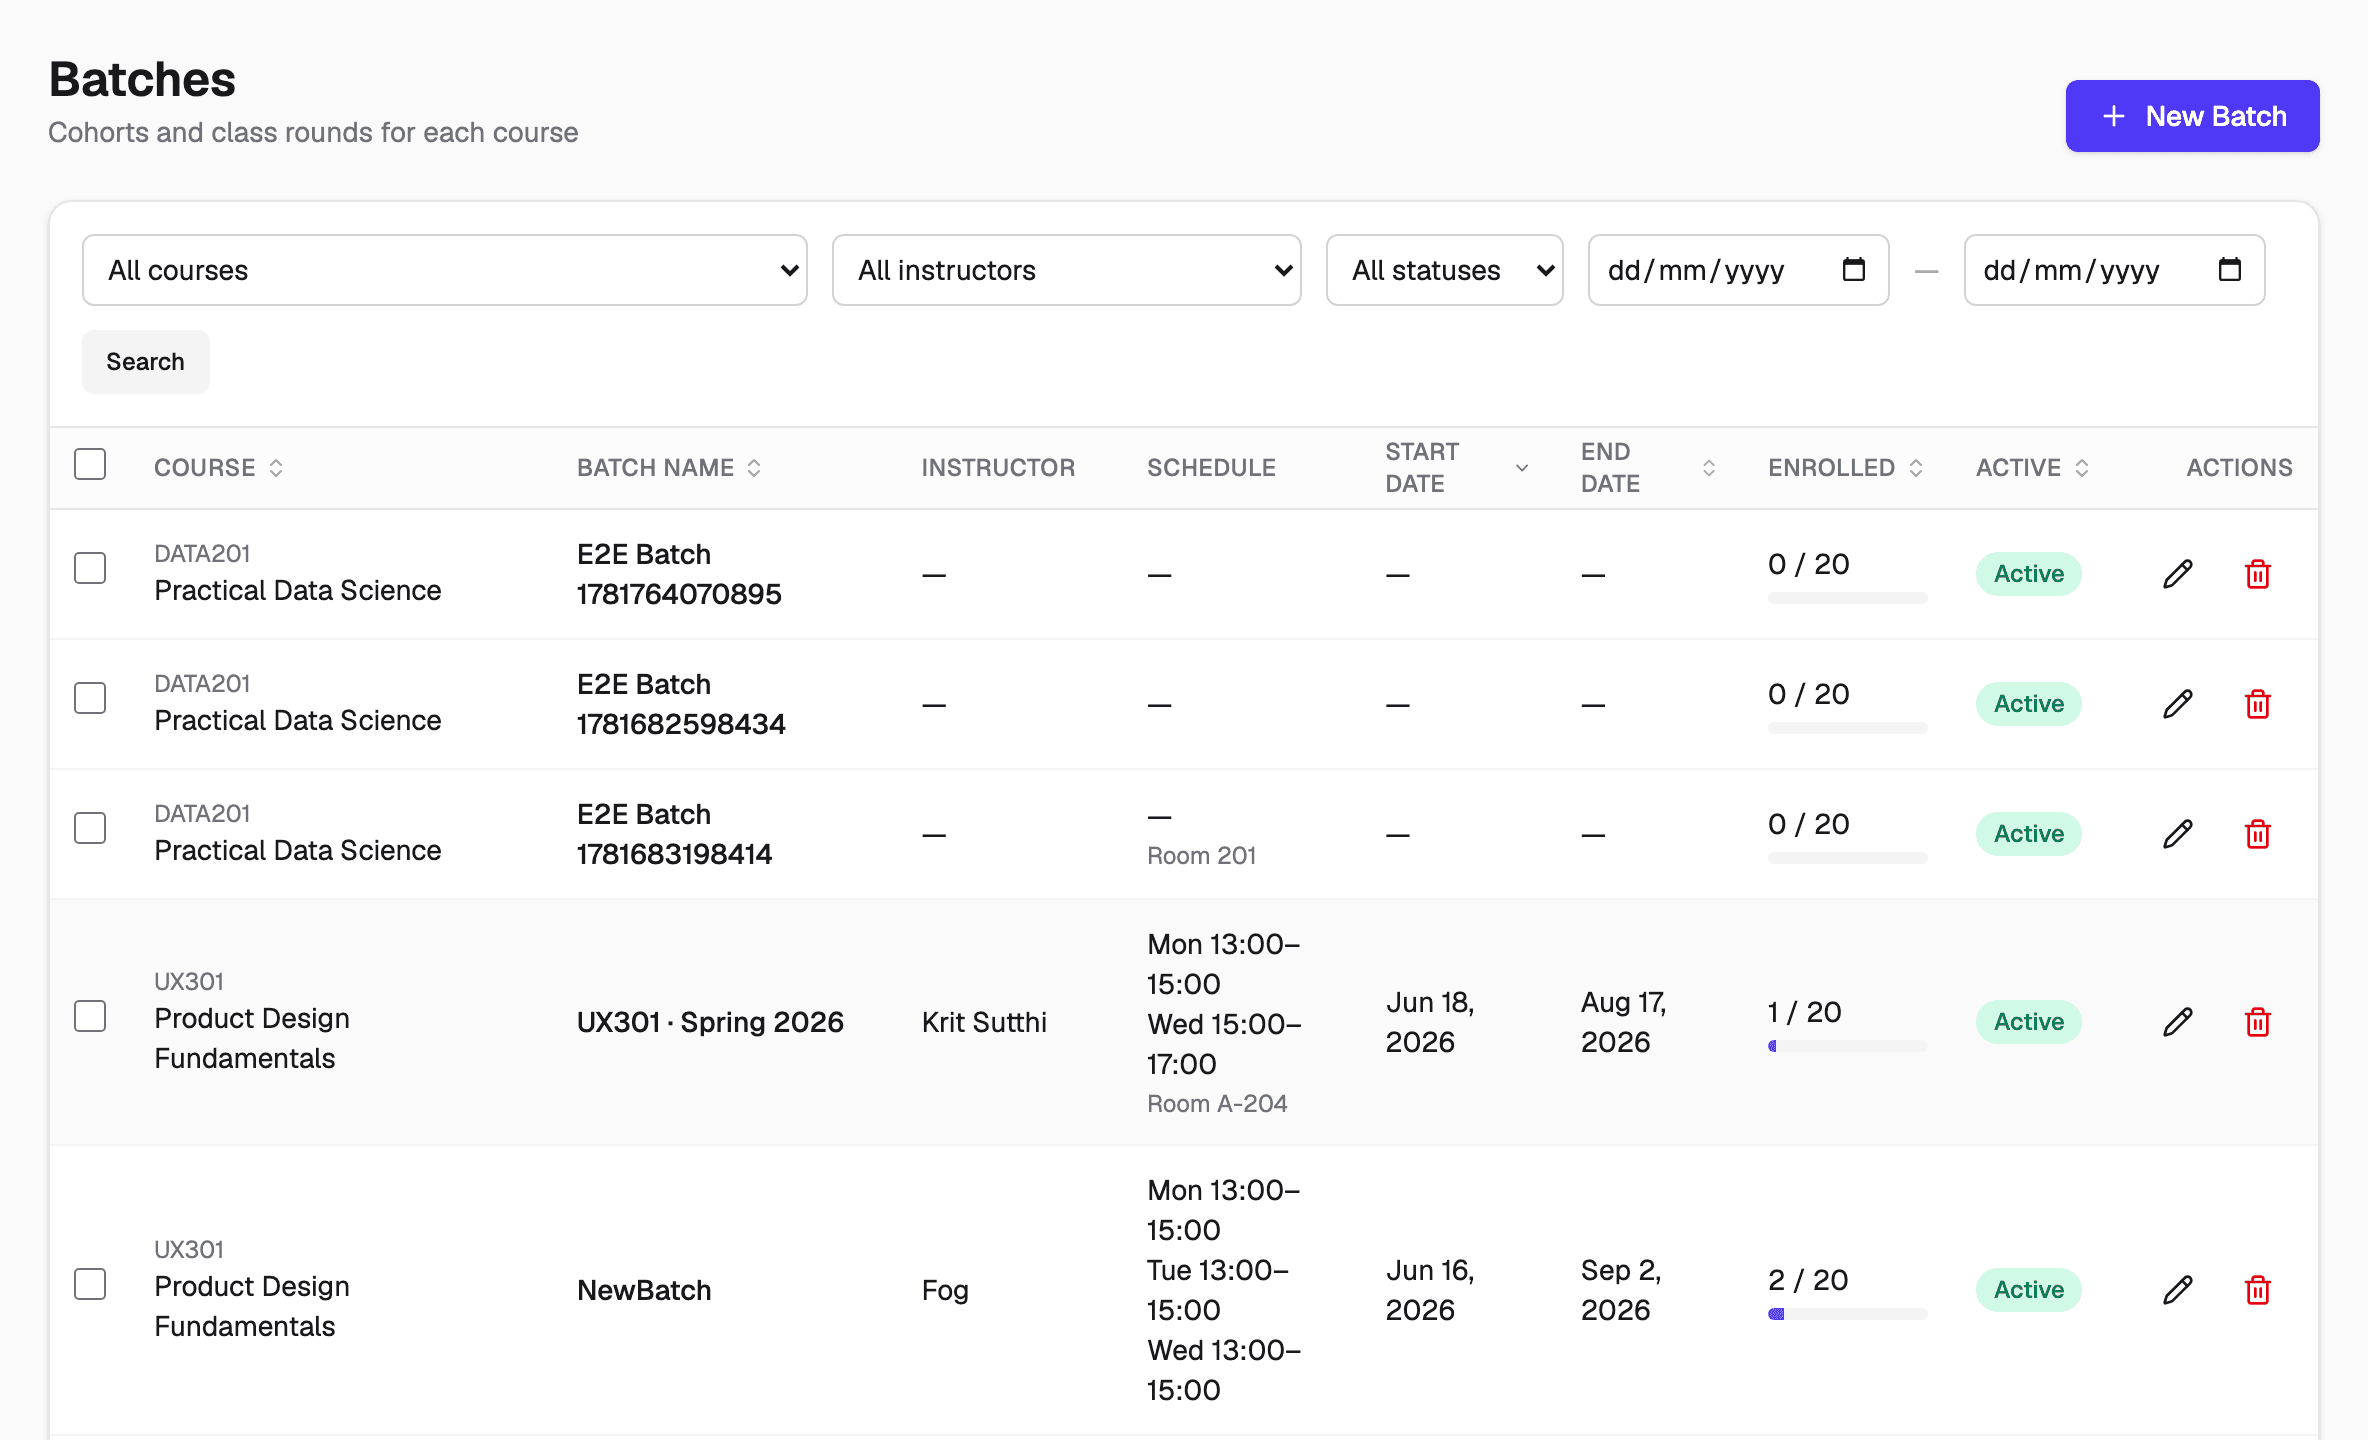
A batch is one run (cohort) of a course — the unit you actually teach. Create it from Batches: pick the course, branch, and instructor(s), set the weekly schedule (days and times) with start and end dates, and a capacity.
Coursenomic generates the individual class sessions from that schedule, and warns you before an instructor or room is double-booked. The Schedule view shows every upcoming session across batches.
Students & enrollment
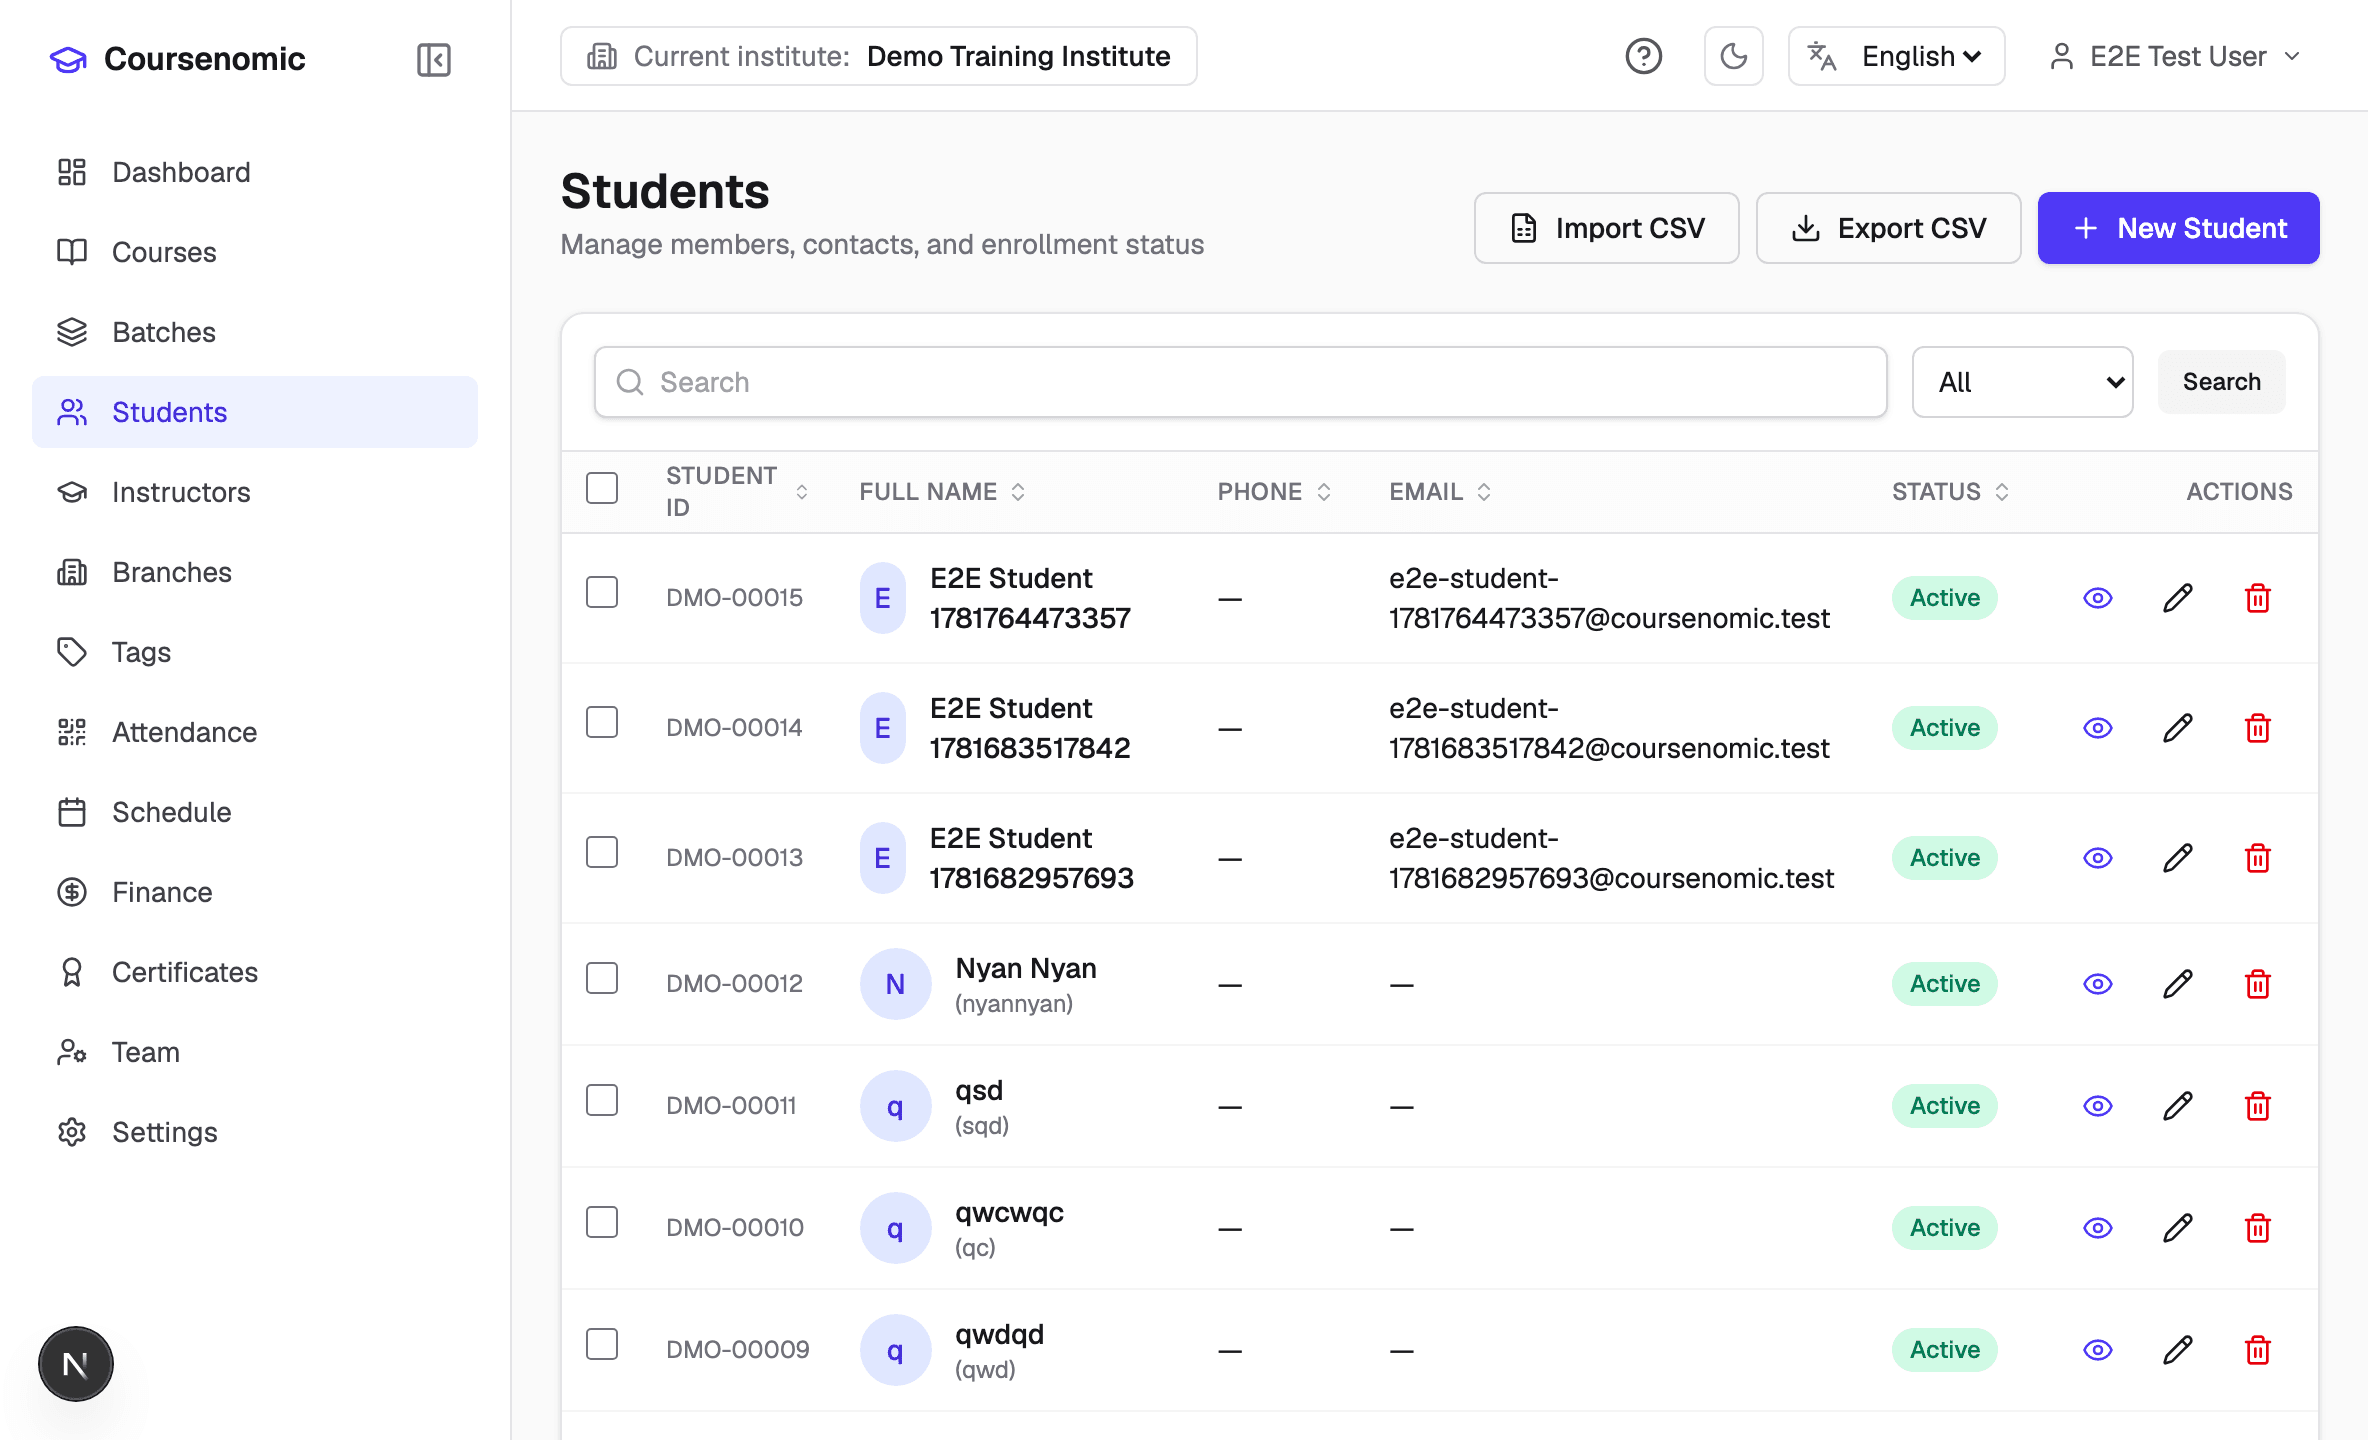
Add learners in Students with their name, contact, optional LINE account, and photo. Each student gets an ID built from your institute prefix automatically.
Enroll a student into a batch to put them on its roster; each enrollment tracks its own payment status. Import many students at once with CSV.
Attendance & check-in
This is the daily ritual. In Attendance, open today's session for a batch — a QR code and a check-in code appear on screen.
- 1Open the sessionPick the batch and open its session. Project the QR and code so the class can see them.
- 2Students check inStudents scan the QR (or open the link) and enter their student number. On-time check-ins are marked Present; after the cutoff, Late.
- 3Other methodsMark students manually from the roster, or use face recognition where set up.
- 4ReviewSee live Present / Late / Absent counts and each student's attendance %. Export a session or report to CSV.
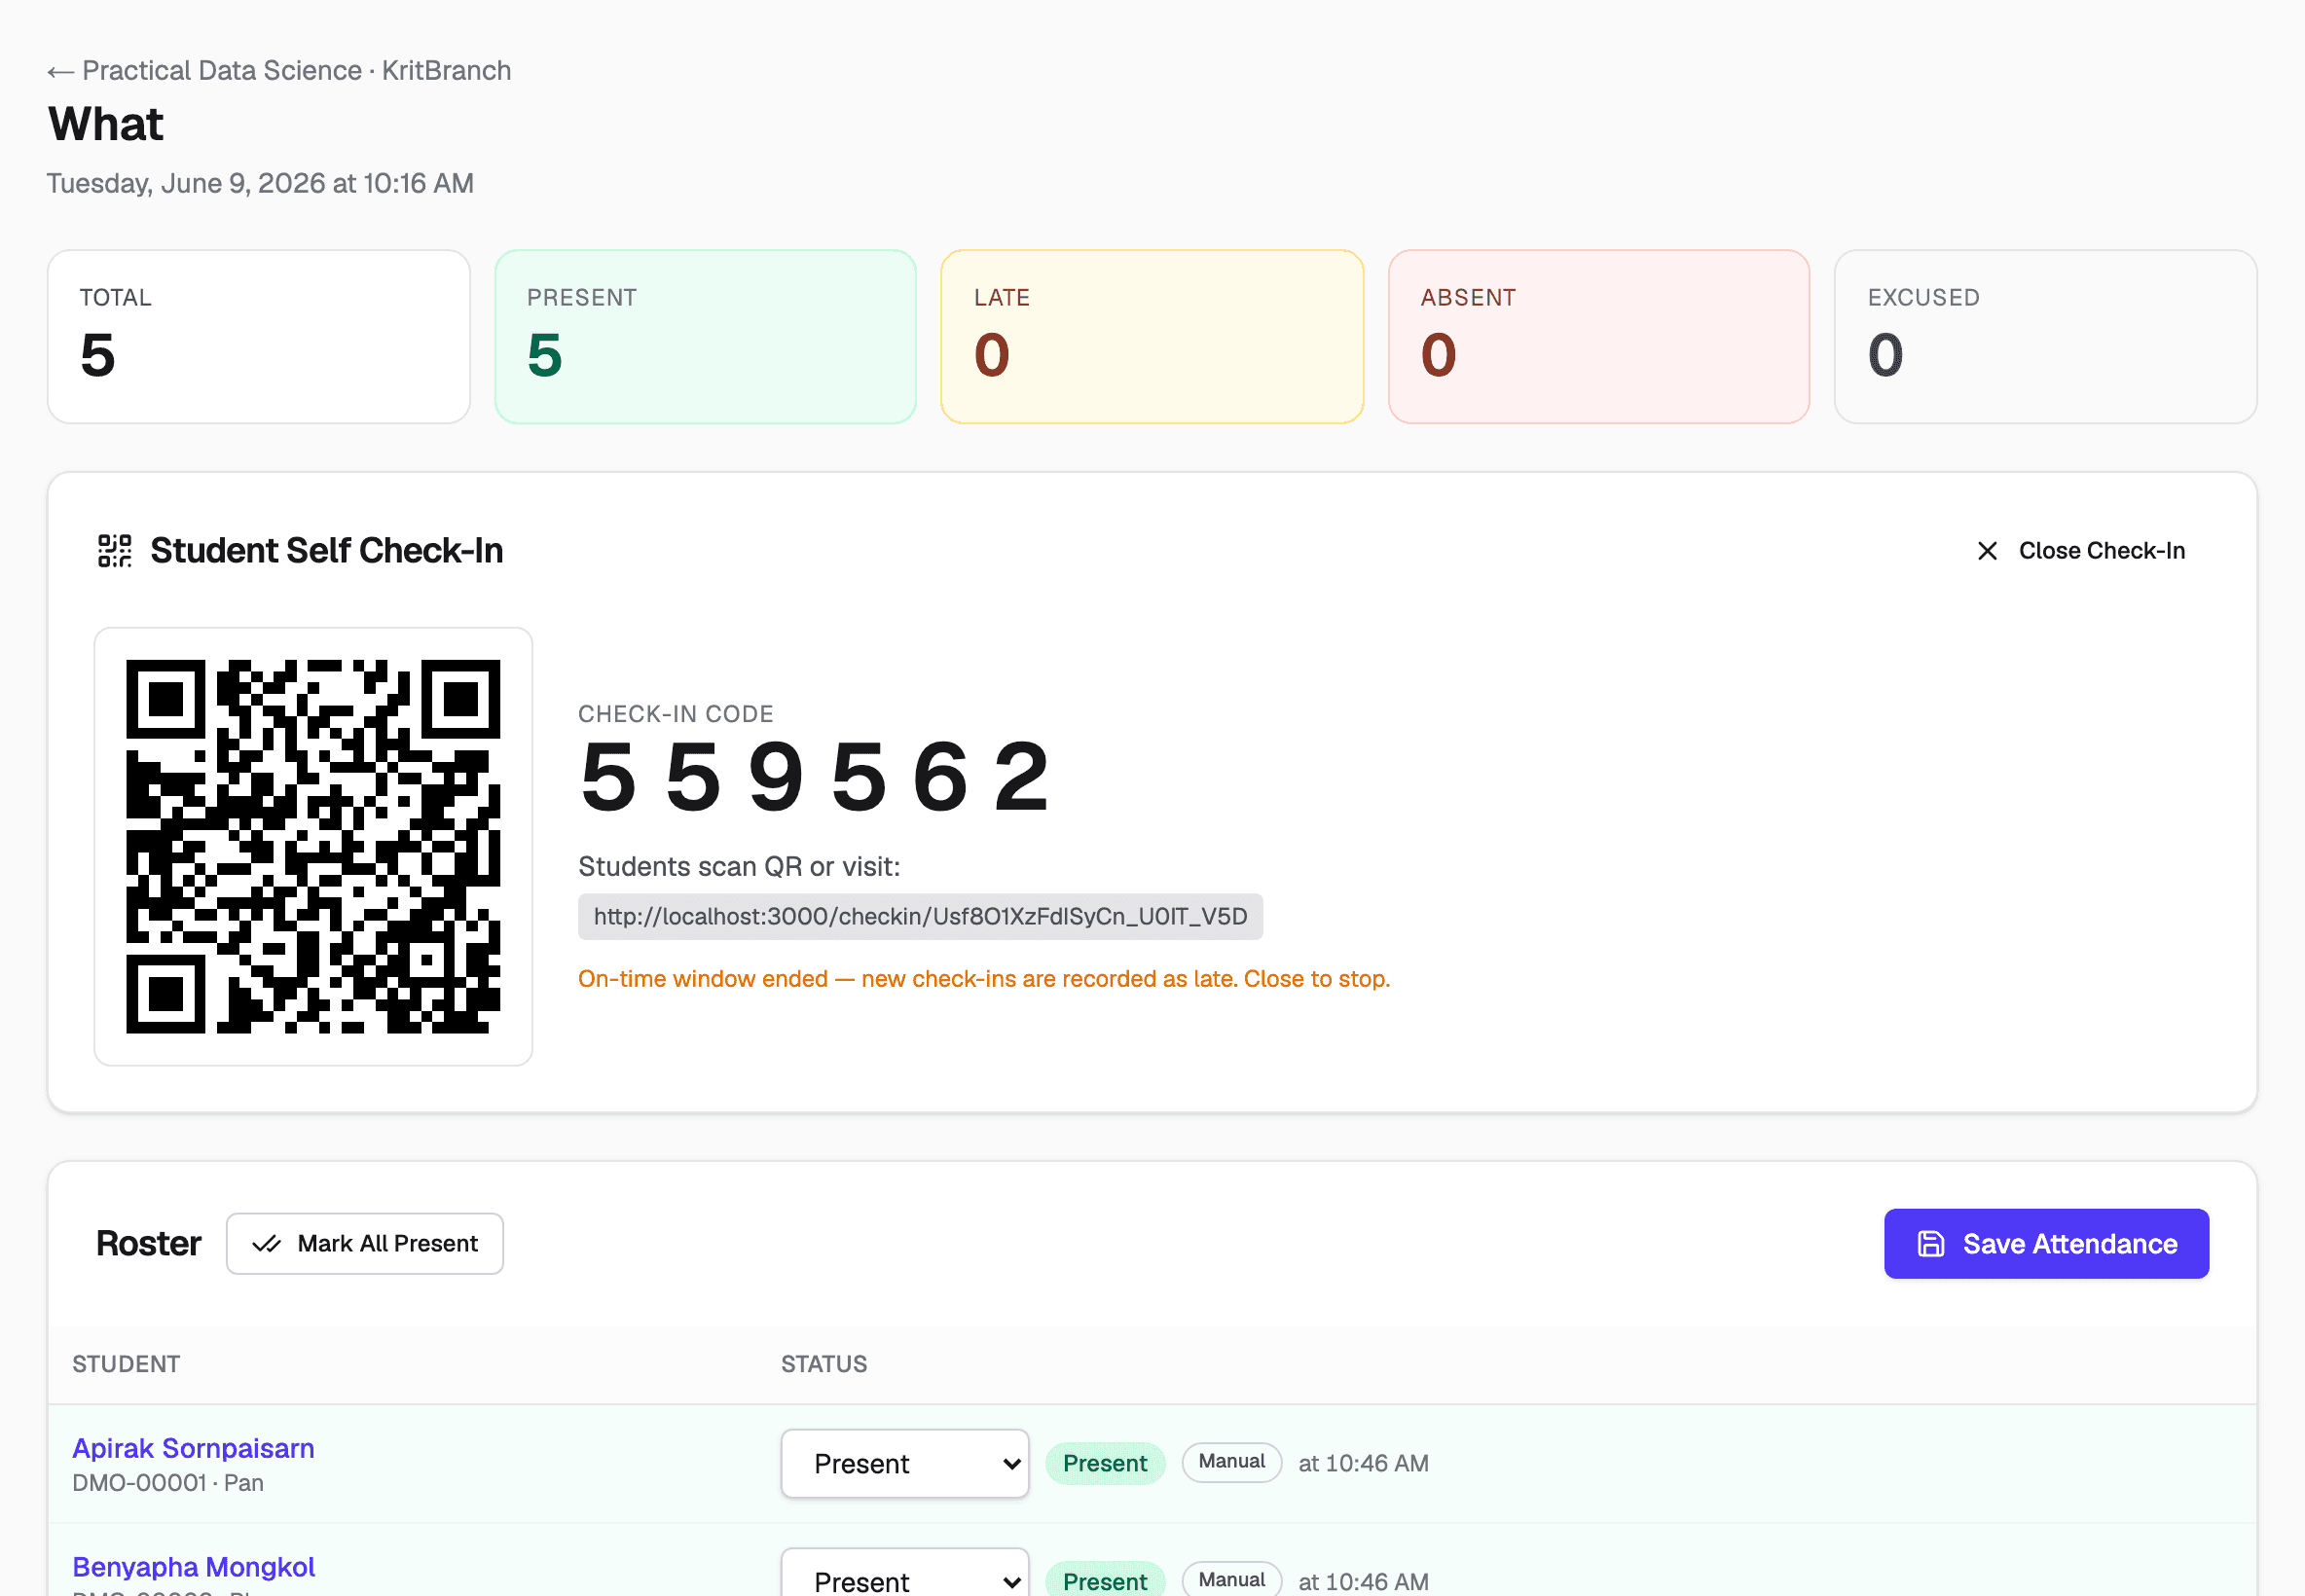
Attendance % rolls up automatically and decides who's eligible for a certificate, based on each course's threshold.
Certificates
Issue certificates from Certificates. Choose a course and batch, select the students, and the system pre-fills each one's attendance % from their sessions — add a final score if you use one. Download any certificate as a PDF carrying your logo, signature, a verification code, and a QR.
Anyone can confirm a certificate at /verify/<code> — no login. Design how certificates look with Customize certificate: accent color, logo, and signatory.
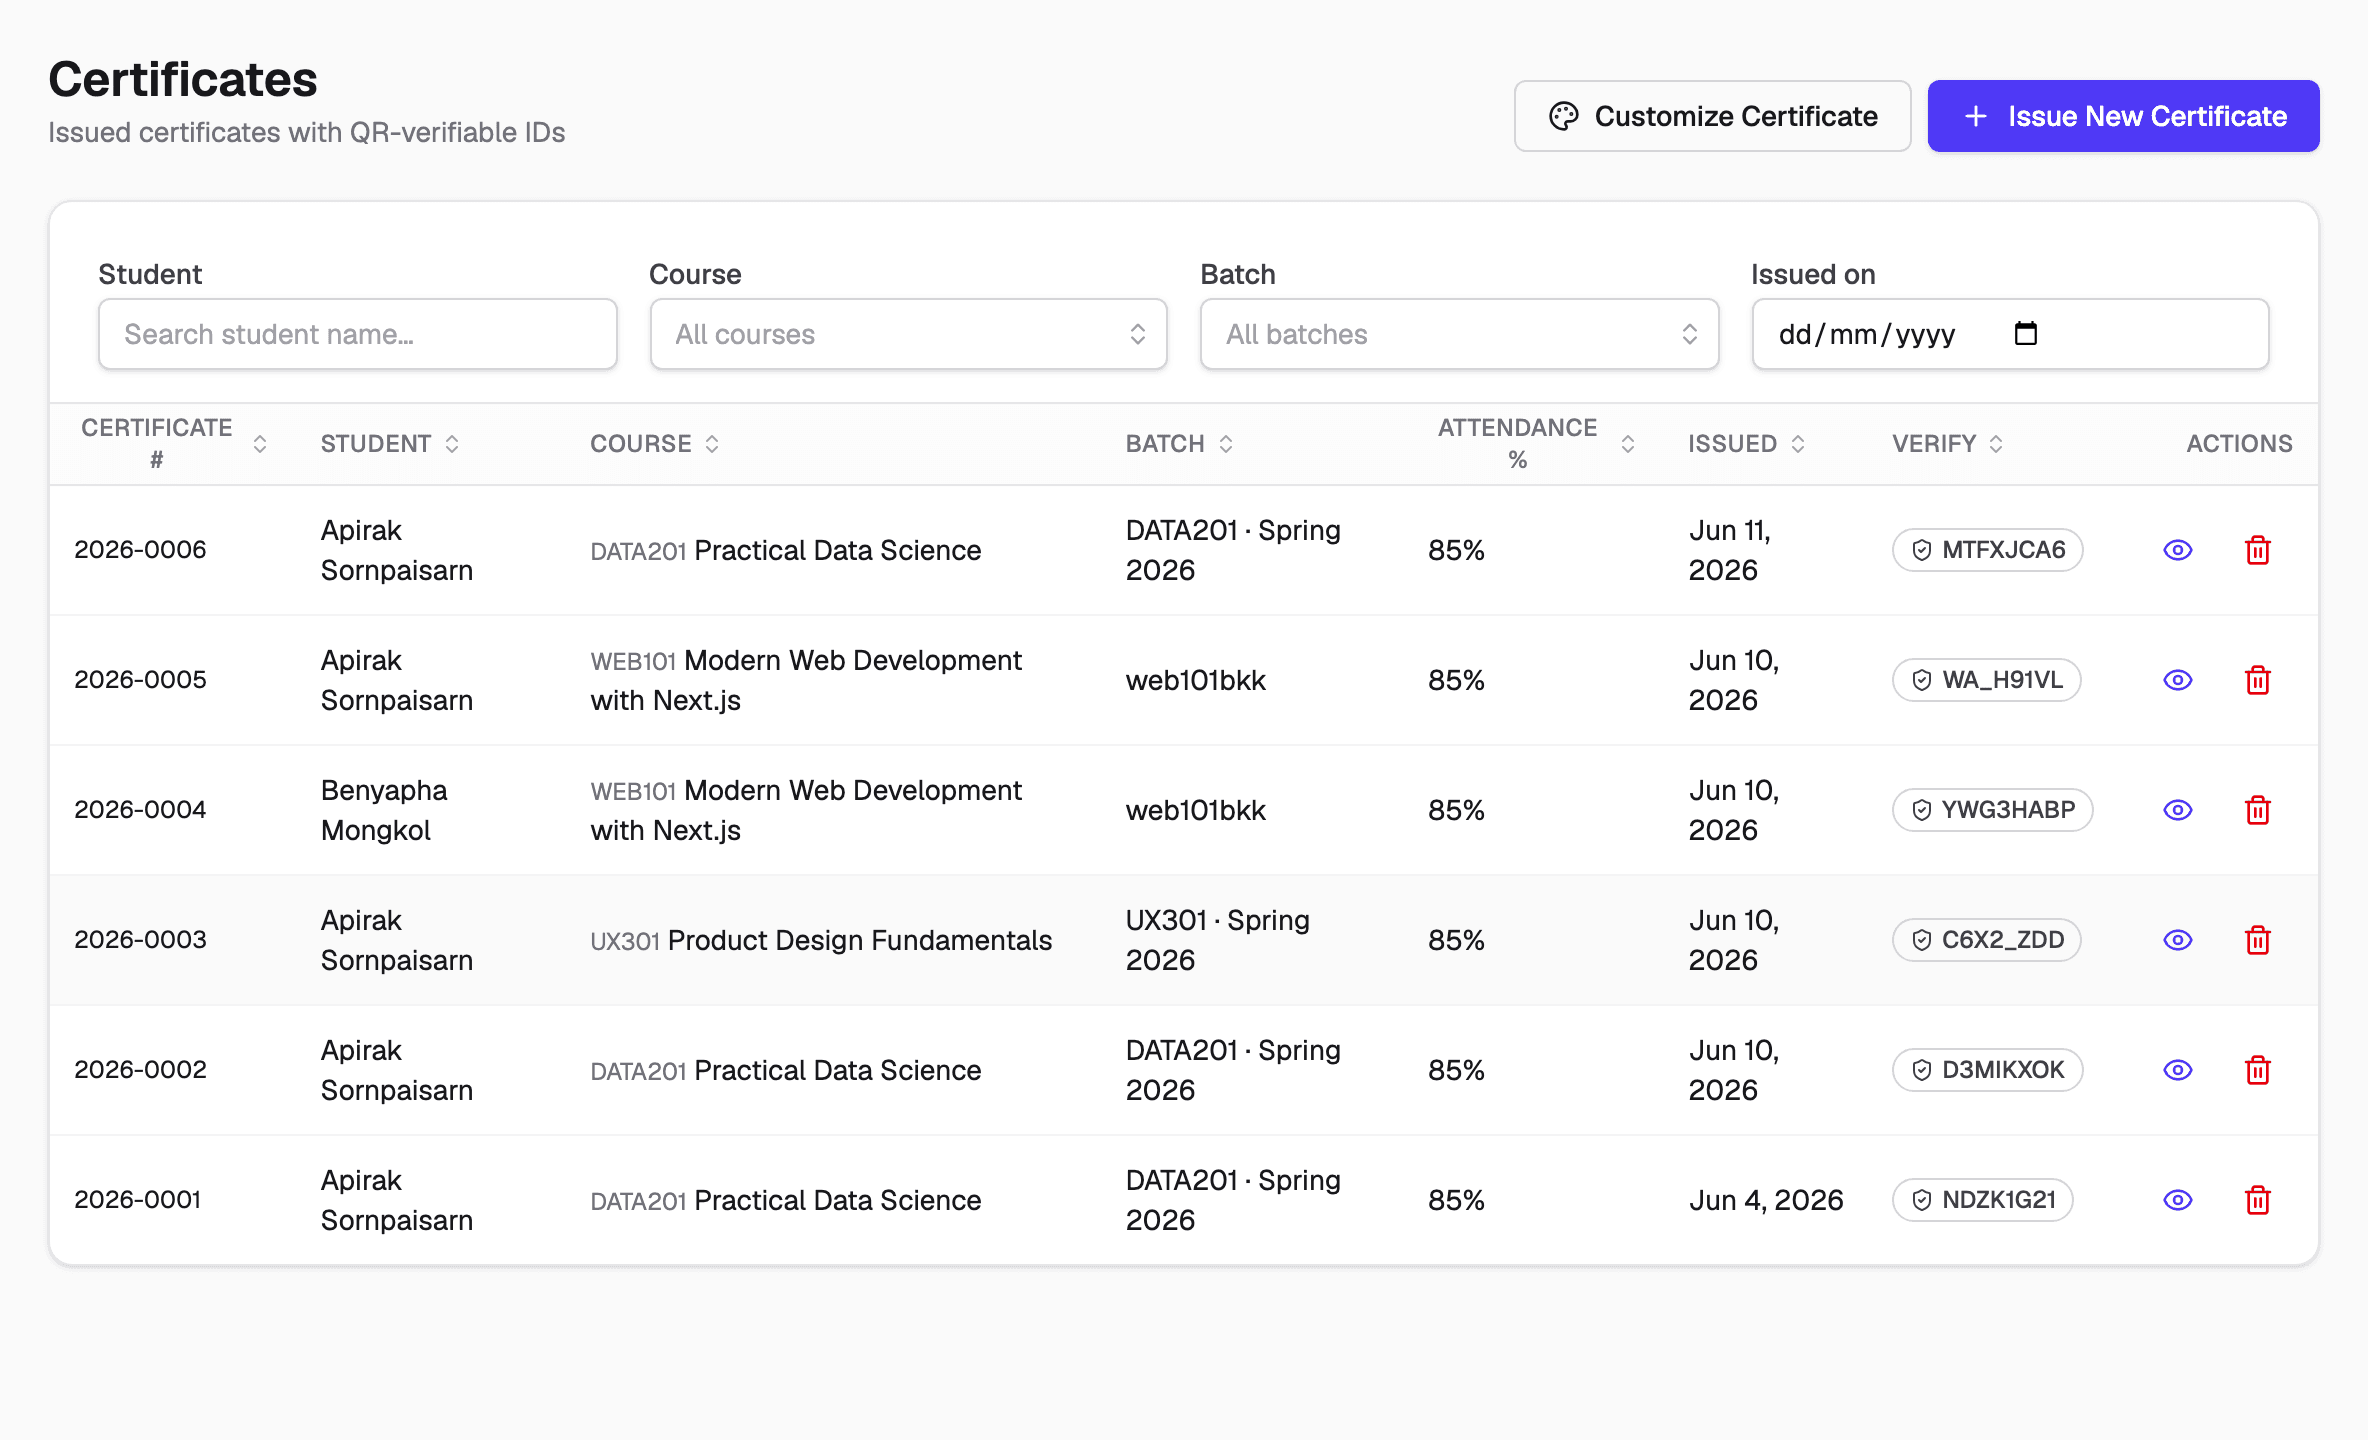
Every certificate prints its verification code and QR, so employers and students can check it themselves.
Finance & revenue
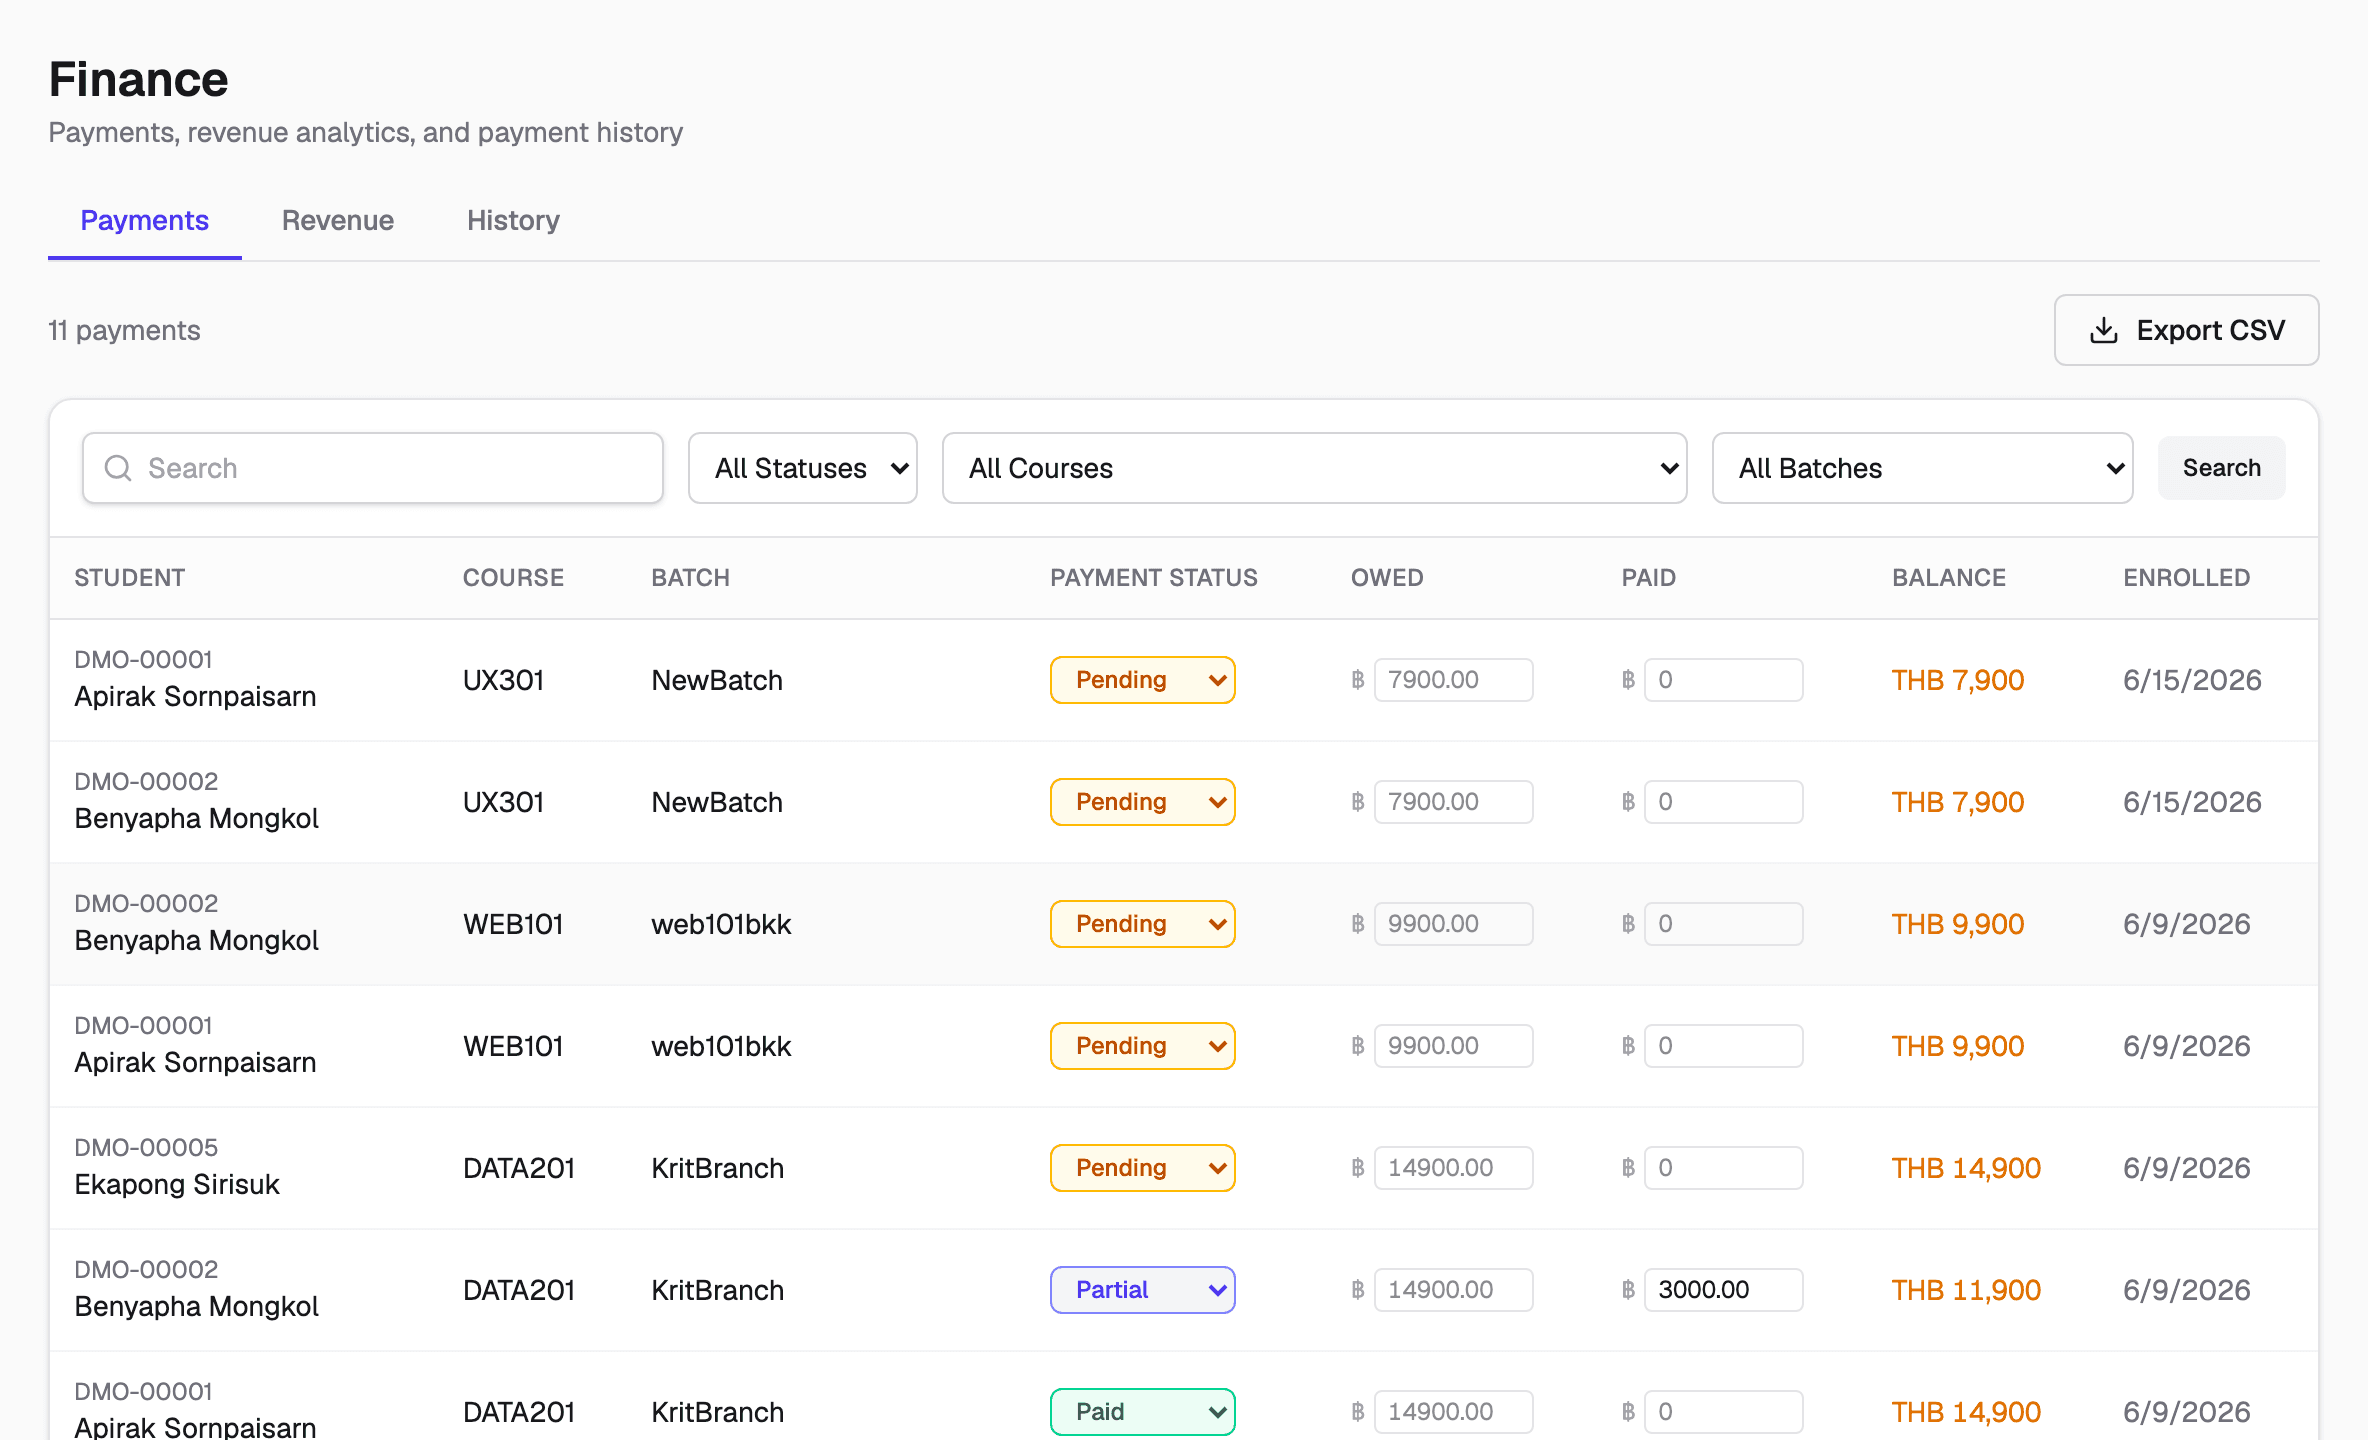
Track money in Finance. Each enrollment has a payment status — Pending, Partial, Paid, Refunded, or Waived.
The revenue summary shows what's expected, collected, and outstanding, broken down by course, branch, and tag, with a monthly trend. The history tab logs every payment change — who changed it, when, and from what to what.
Branches & team
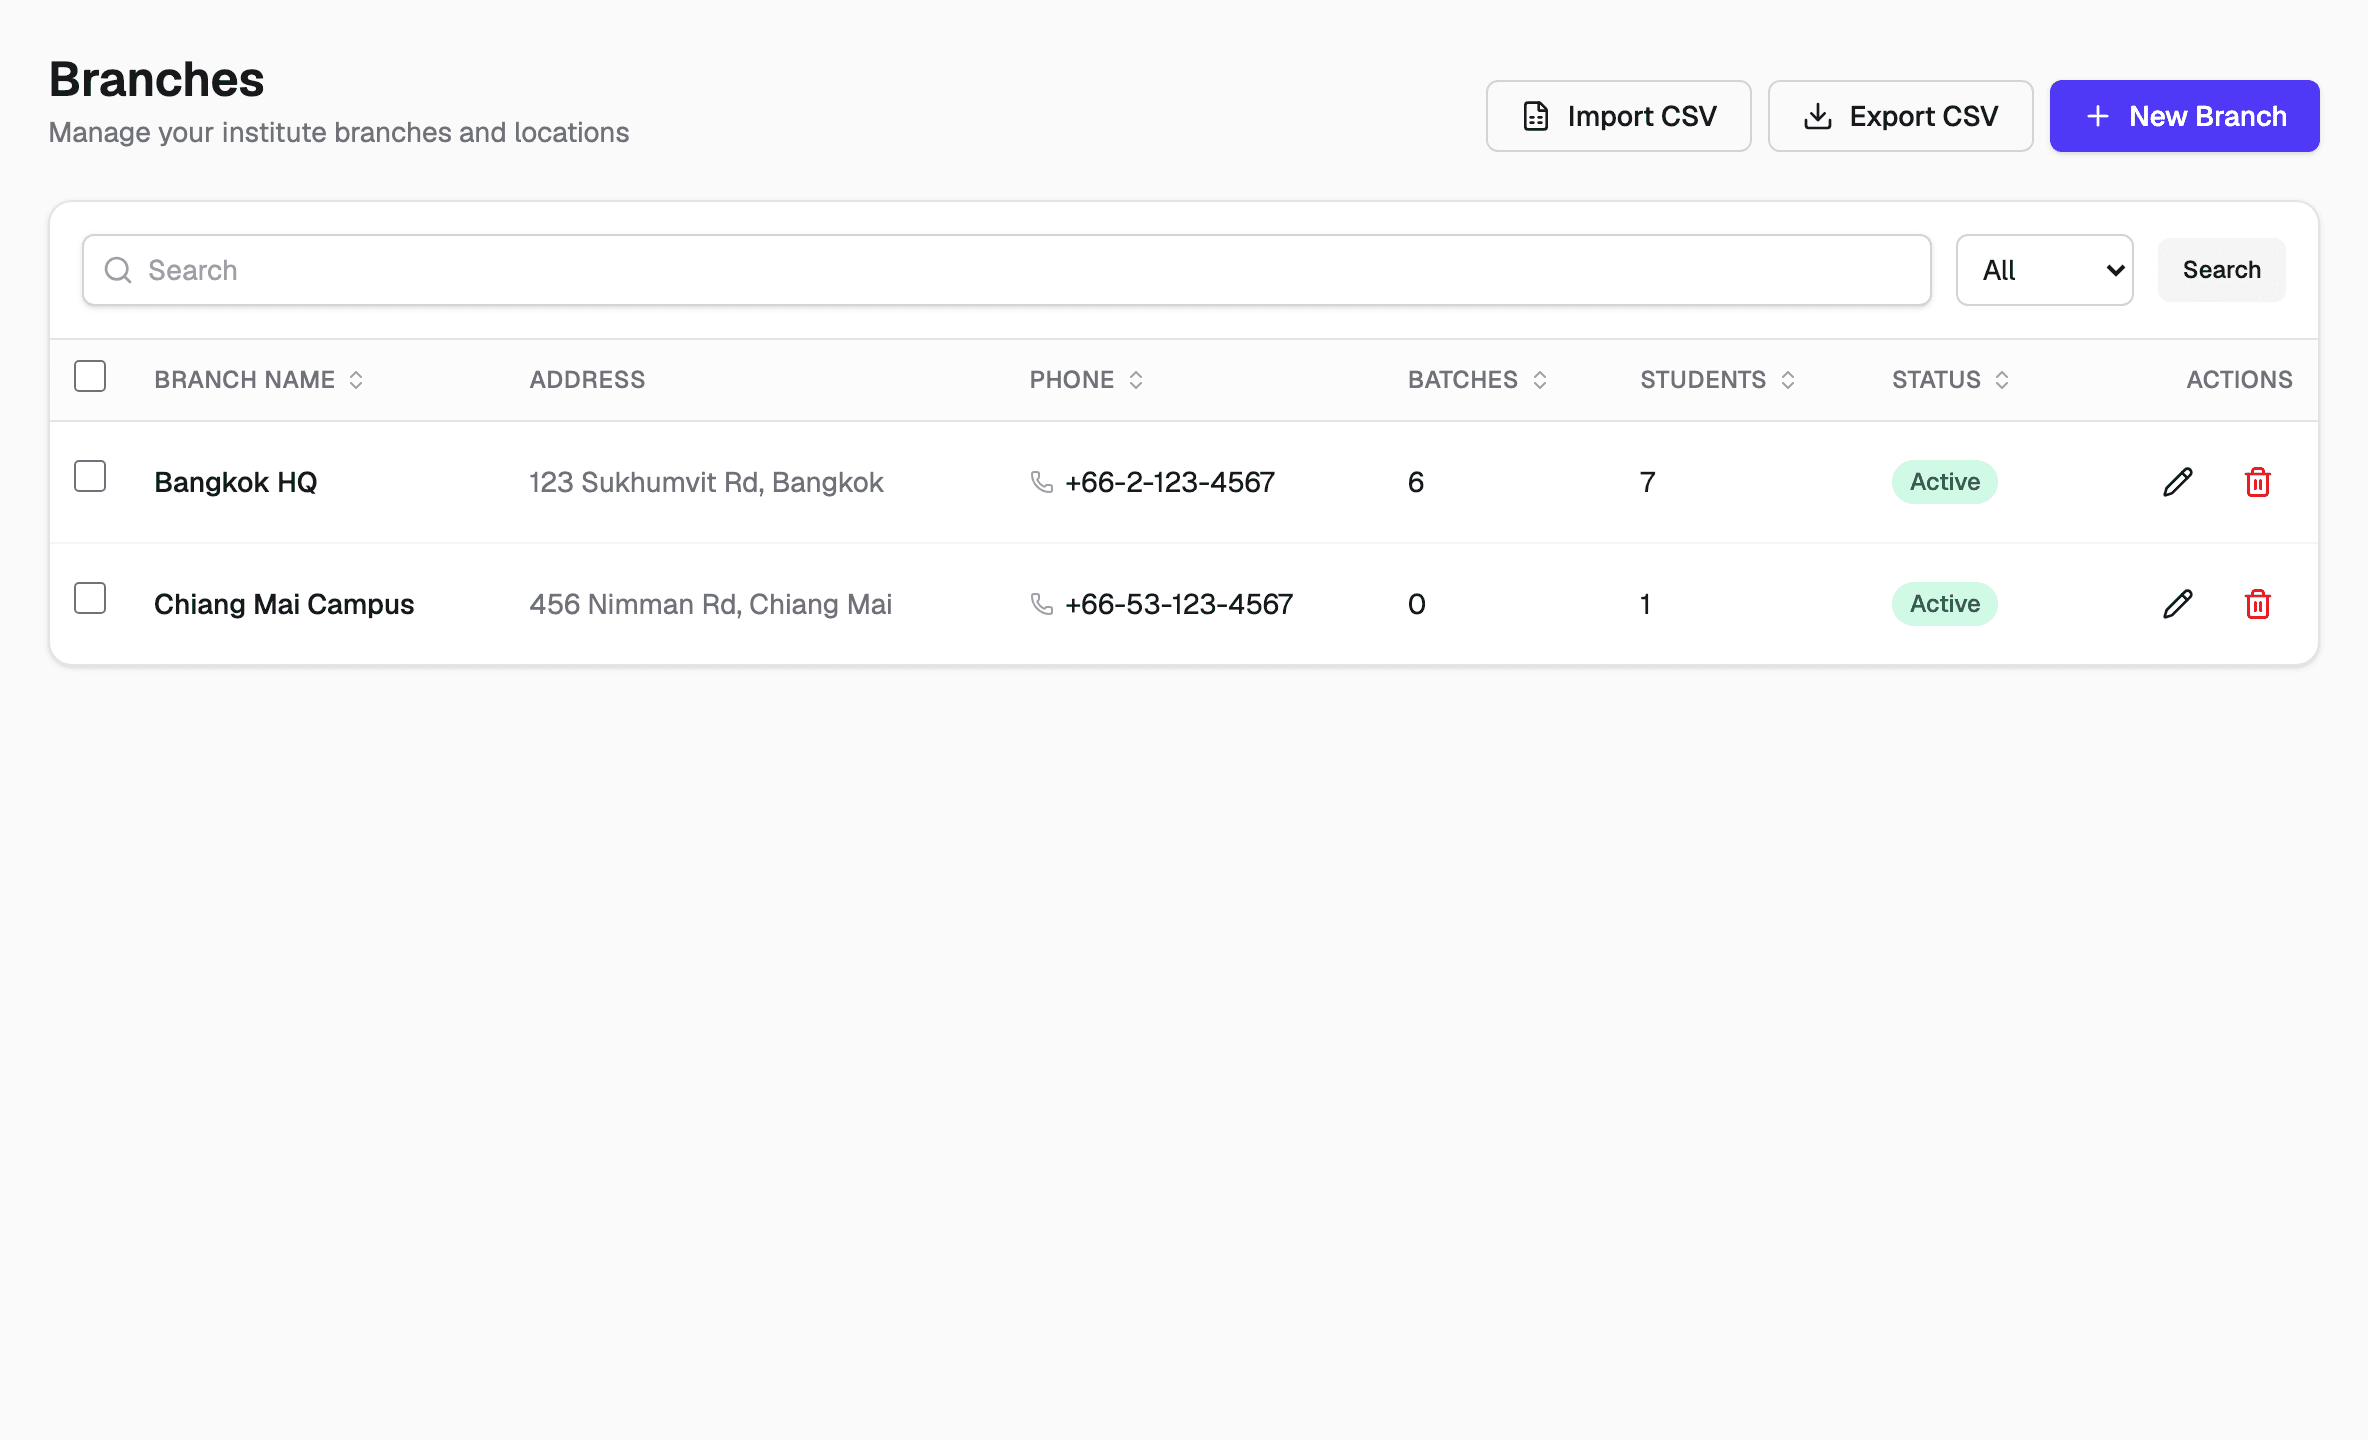
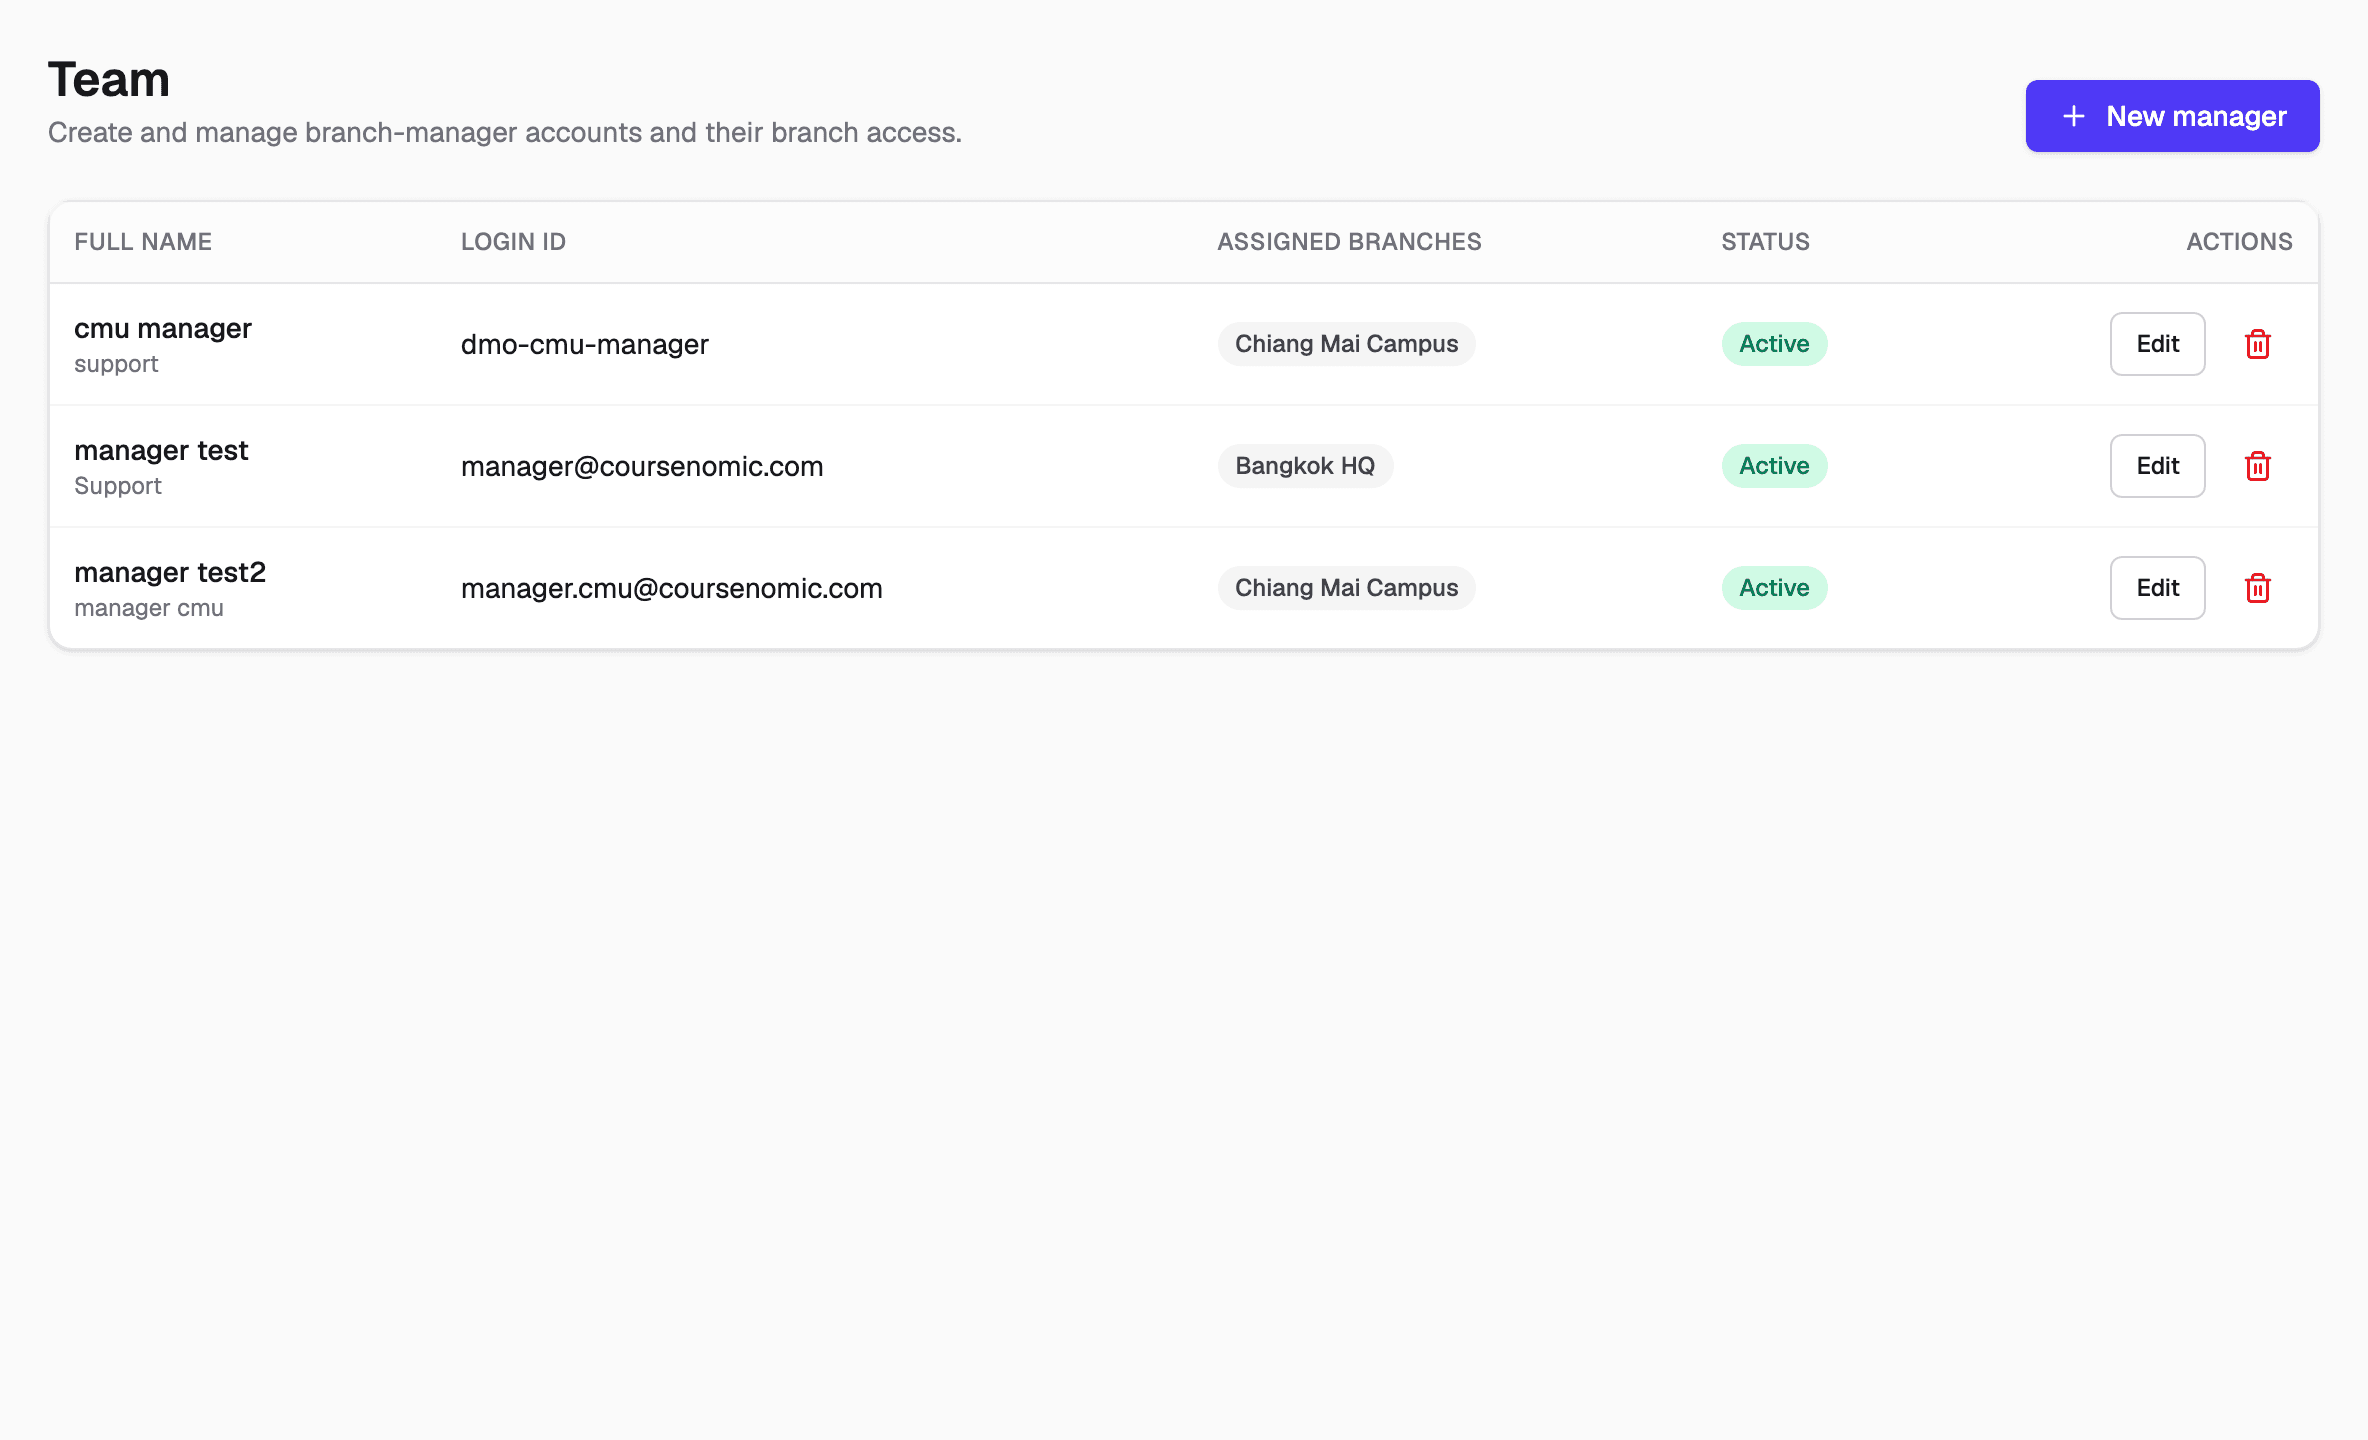
Run multiple locations from Branches, then invite staff in Team — either by email (they set their own password from a link) or directly with a username and password you set.
Assign each manager to specific branches. Managers see and manage only those branches' students, batches, attendance, and certificates; owners see everything.
LINE integration
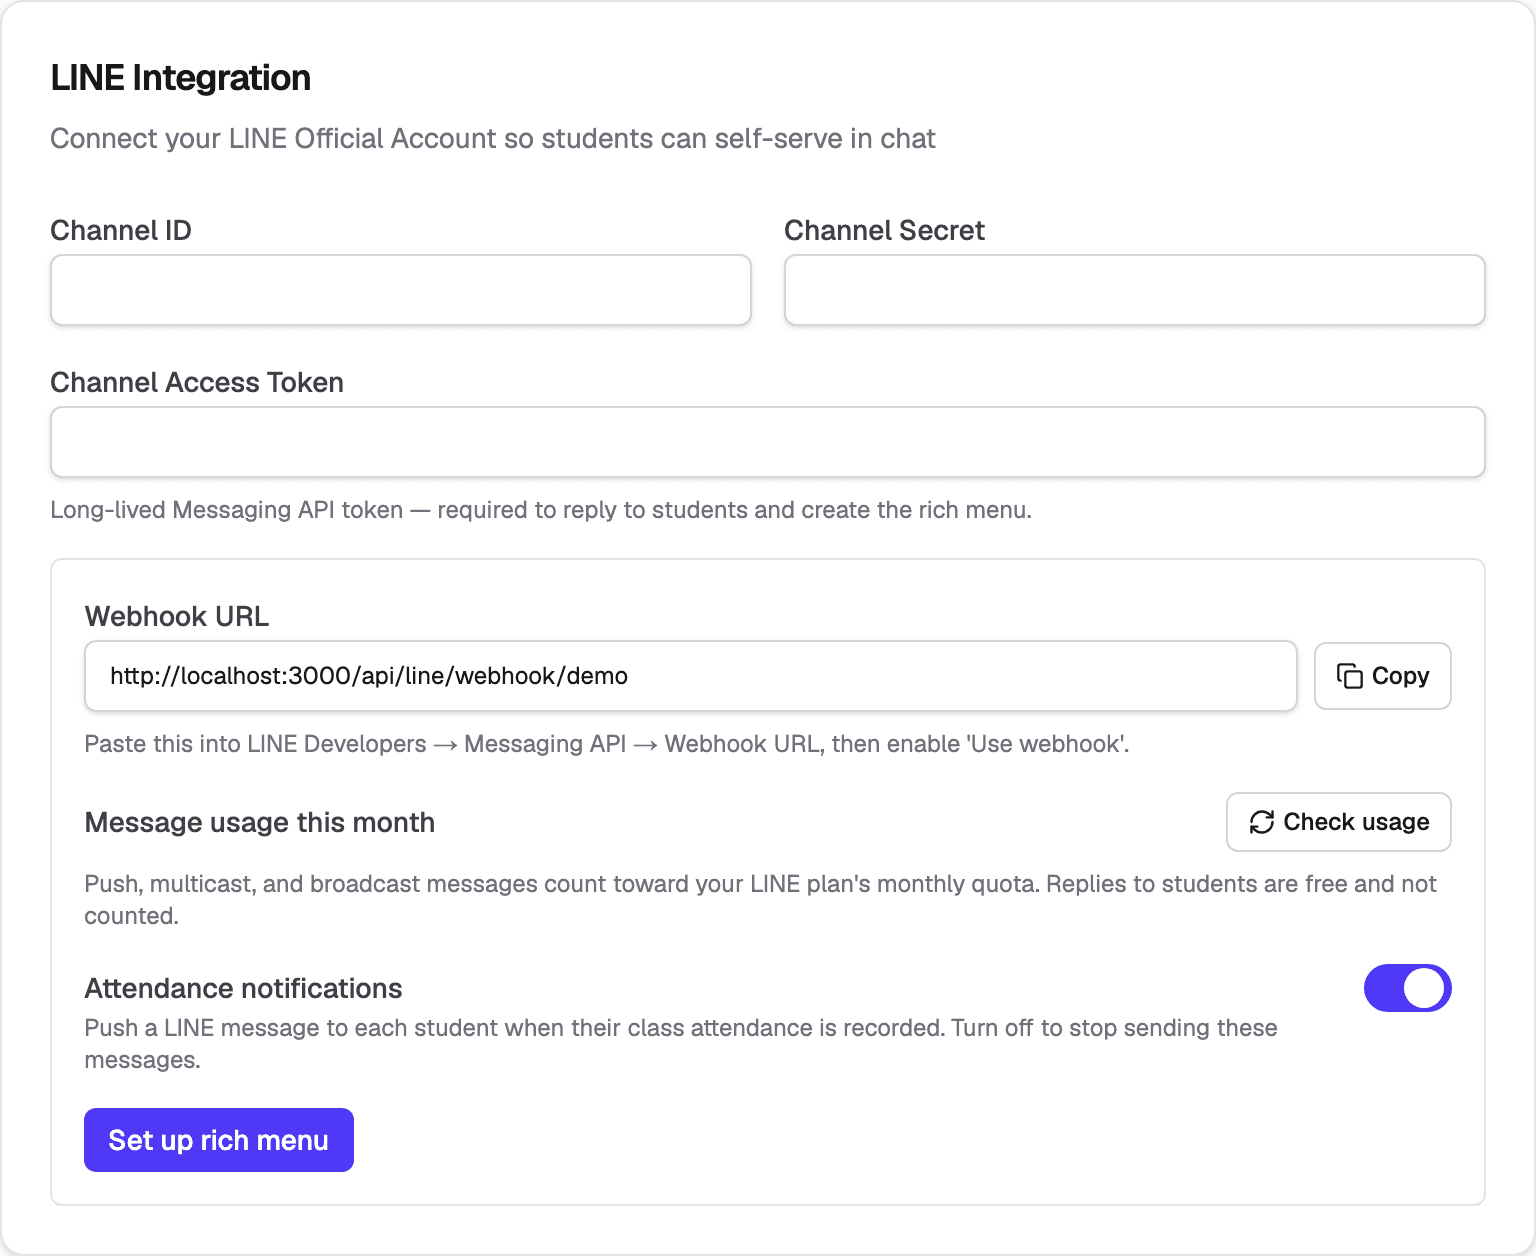
Connect your LINE Official Account in Settings: paste your Channel ID, channel secret, and access token, then copy the webhook URL into the LINE Developers console. Publish the rich menu so students get quick buttons for their schedule, courses, and certificates.
Students then receive check-in confirmations and a note when their certificate is ready, and can pull their own schedule and certificates from the chat.
LINE integration is available on paid plans.
Plans & subscription
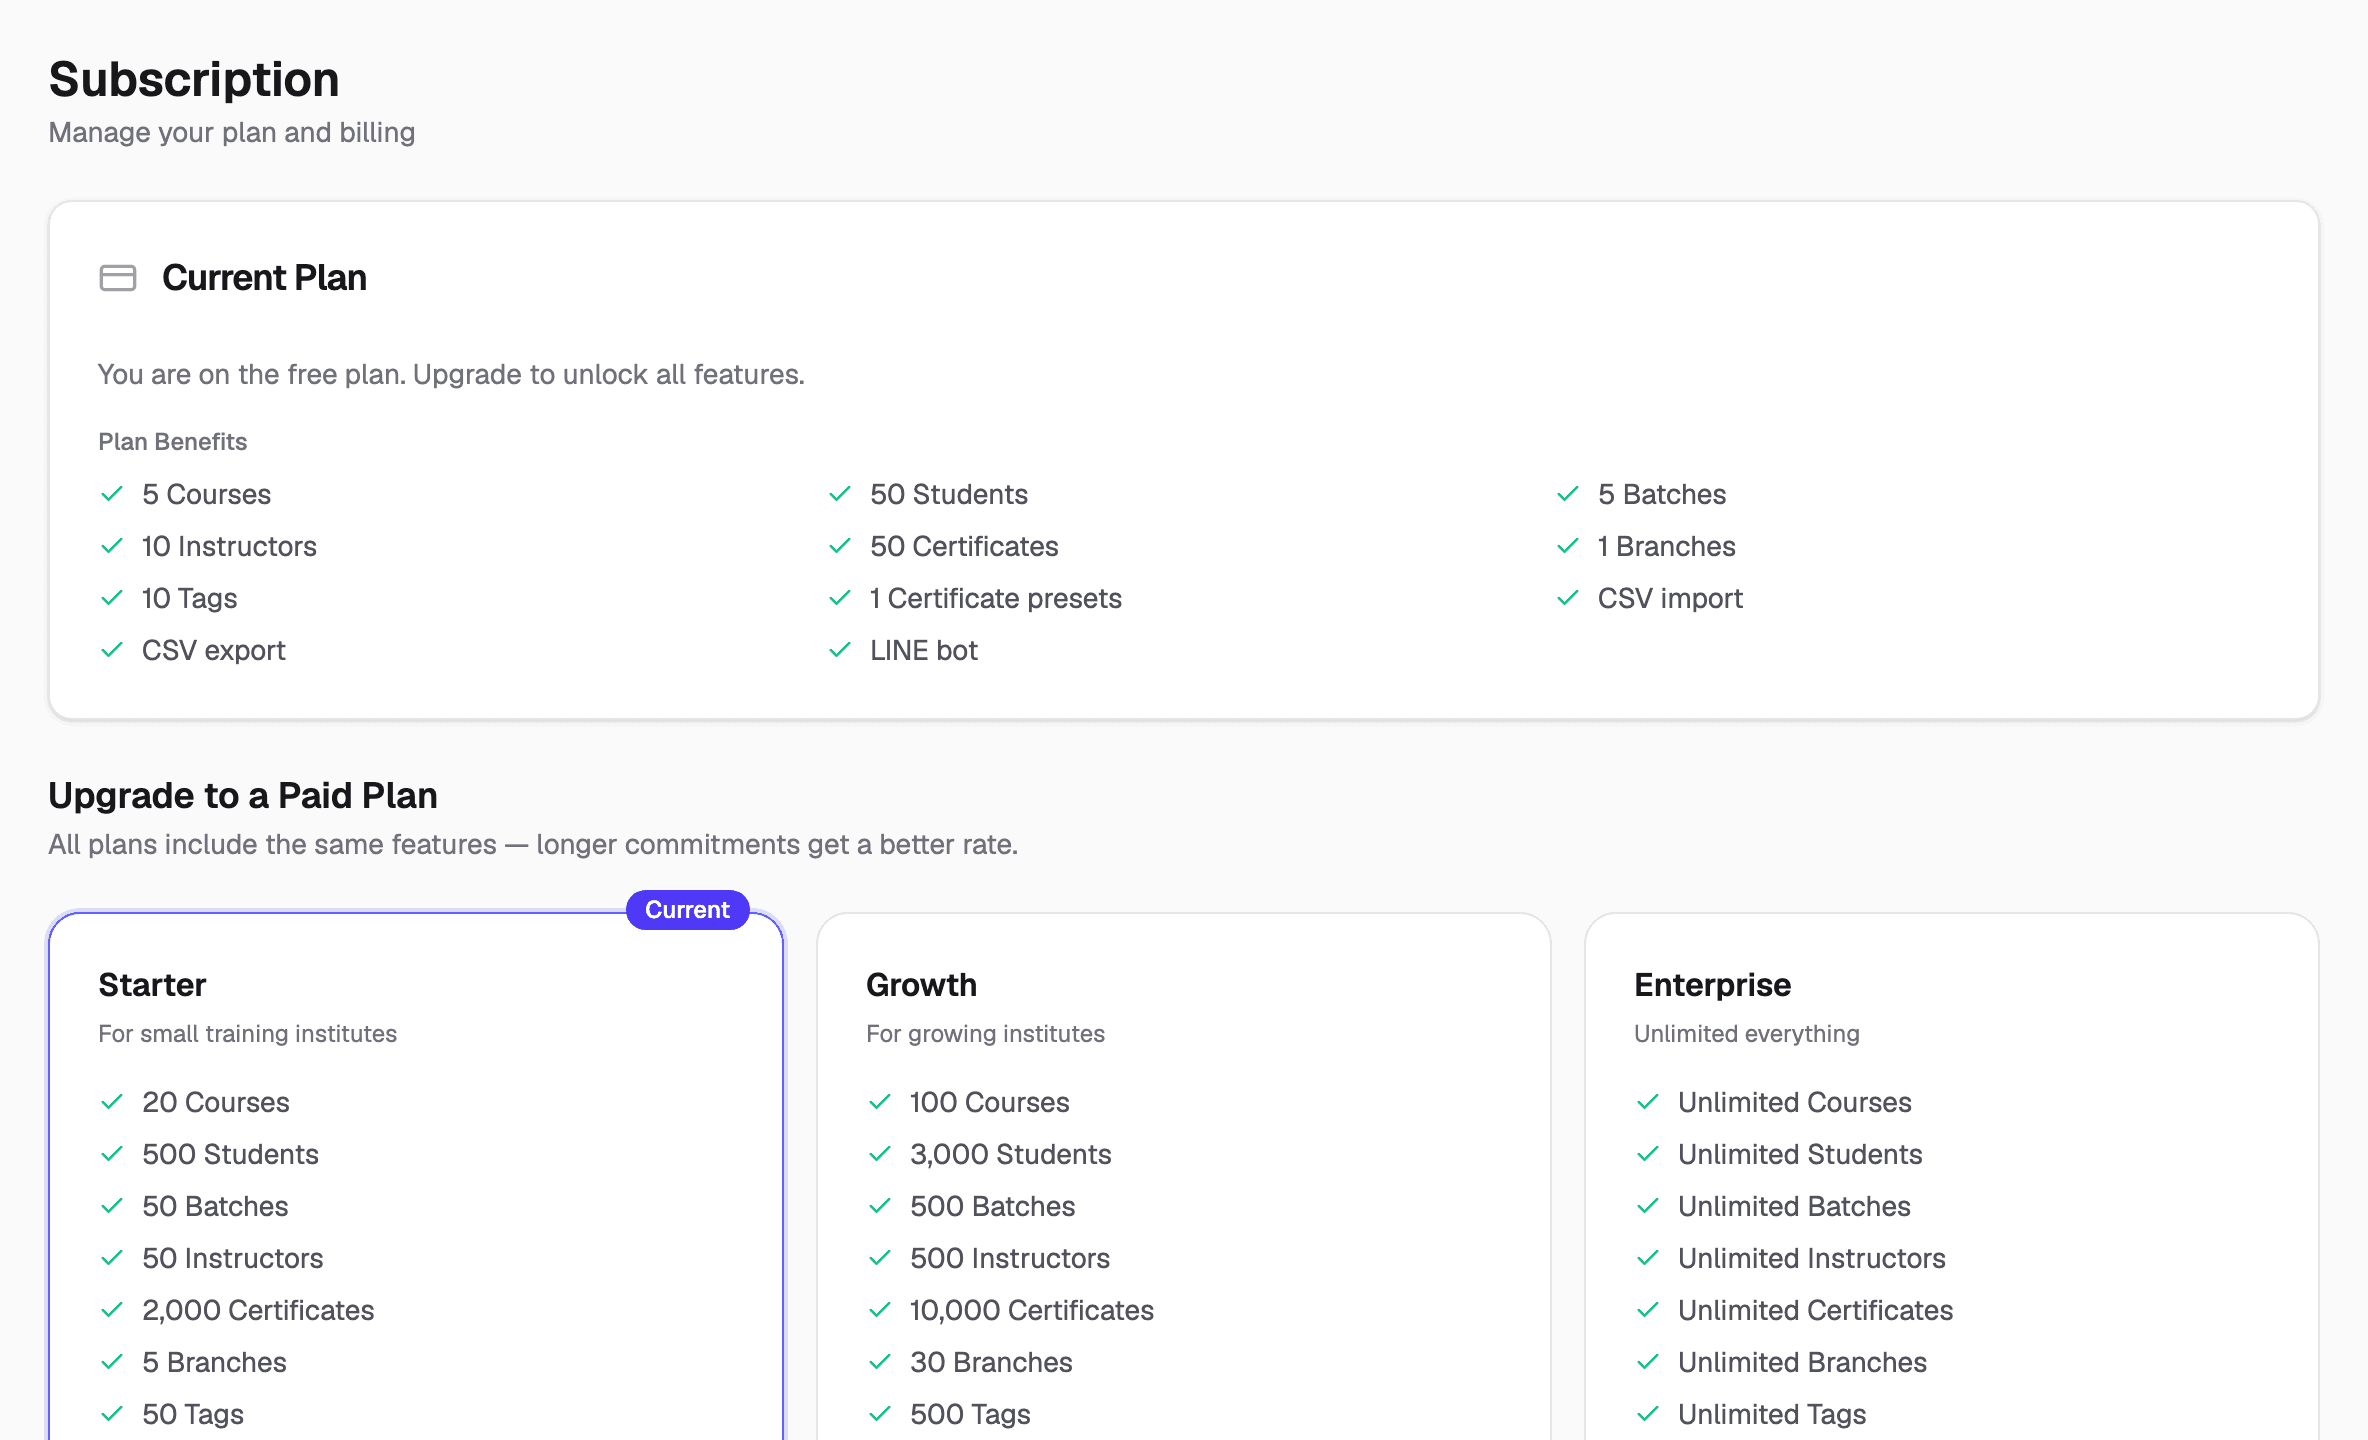
Coursenomic has a Free tier and paid tiers (Starter, Growth, Enterprise). Pay monthly, quarterly, or yearly — a longer commitment lowers the effective monthly rate. Each plan sets limits (students, courses, batches, branches, and more) and unlocks features like CSV and LINE.
Manage everything in Subscription: change plan, cancel (you keep access until the period ends), or resume. If a payment is past due, there's a 7-day grace window to update your card before access pauses.
FAQ
- I forgot my password.
- Use “Forgot password” on the sign-in page; we email a reset link.
- A manager can't see some students or batches.
- Managers only see branches assigned to them. Open Team and assign the right branches.
- A certificate won't verify.
- Enter the full code printed on the certificate at /verify/<code>. A reissued certificate gets a new code.
- My account is past due.
- Update your card in Subscription within the 7-day grace window to avoid a pause.
- How do I switch language?
- Use the EN / ไทย toggle in the top bar. Most of the app is bilingual.